
Easy Garden-Themed Planter from an Ikea Crate
When I think of spring, my mind goes to flowers blooming and ways to display the plants I'll be buying soon.
Today, I'm sharing a simple to make stenciled garden-themed planter from an Ikea crate as part of a lovely Spring Tour - scroll to the bottom to see all of the other wonderful spring inspiration from some of my favorite bloggers.
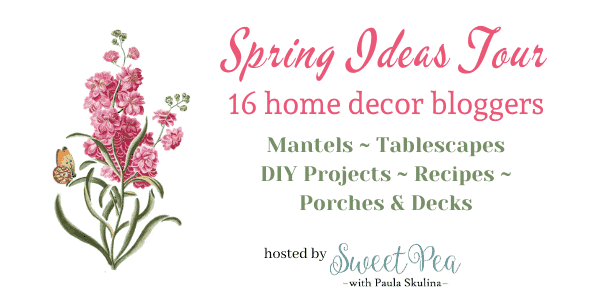
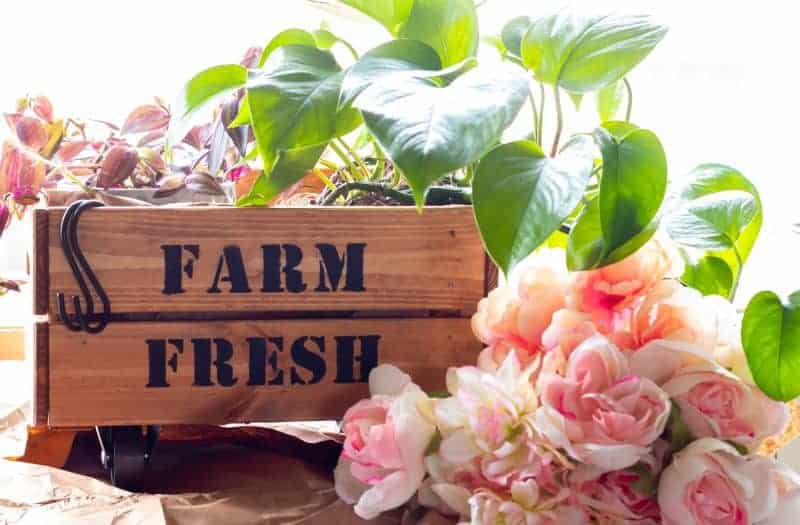
A few months ago, I bought a wooden box from Ikea. I think it was less than $6.00.
*This post may contain affiliate links and I'll earn a commission if you shop through them. You can read my full disclosure here.
Originally, I intended to use the box/crate to cover the top of a lightbox on my china cabinet and that's what I did with it for a few months but then, Spring!
Buying a few more is on my to-do list for when Ikea reopens but for now, I took the one I had and used it for this simple and easy garden-themed planter.
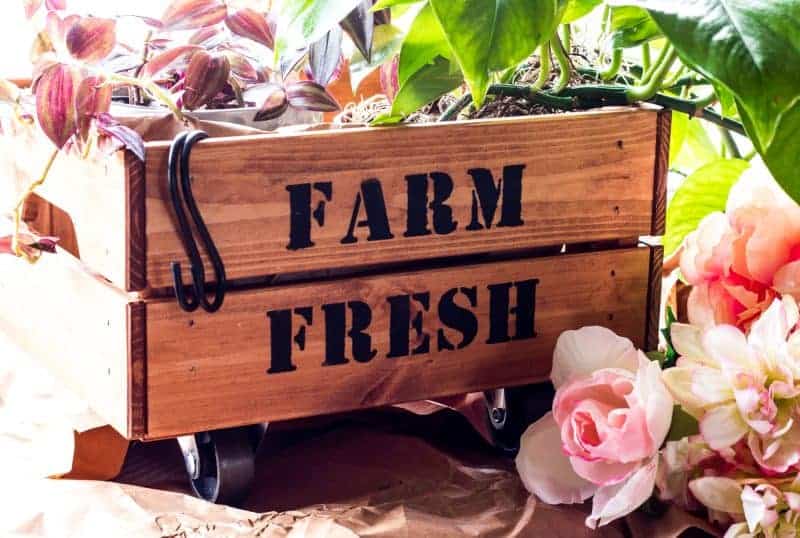
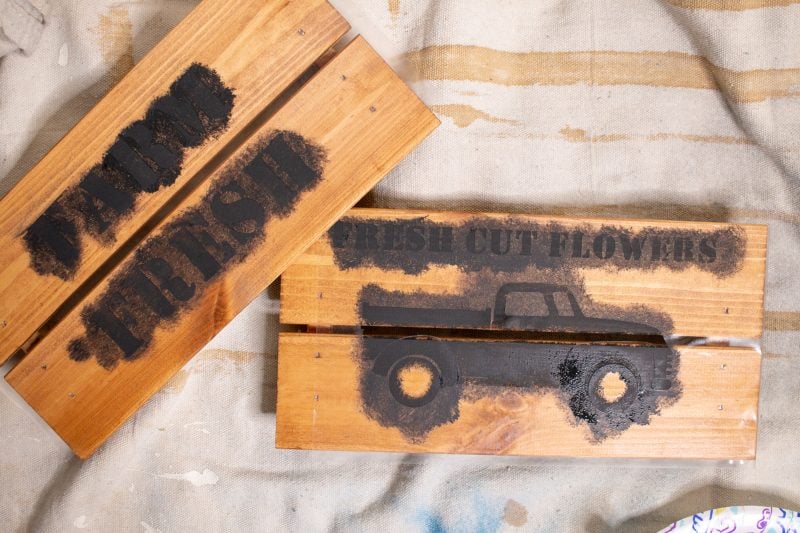
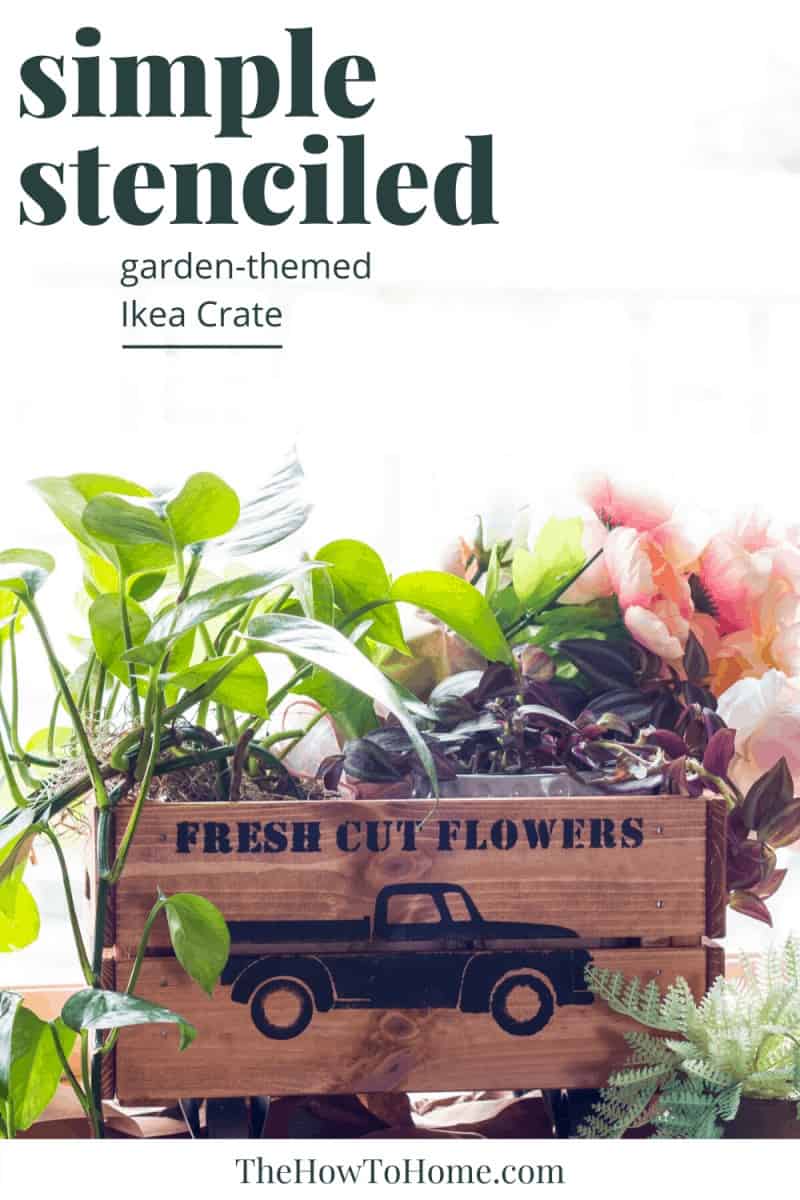
I made two simple stencils for it. One for each side of the box.
There is a vintage truck on one side and Farm Fresh on the other side.
Both stencils were created using Cricut access.
If you would like to use the ones I created, you can see each of them by clicking on the links below:
Vintage Truck Stencil ::: Farm Fresh Stencil
How-To Make Your Garden-Themed Planter
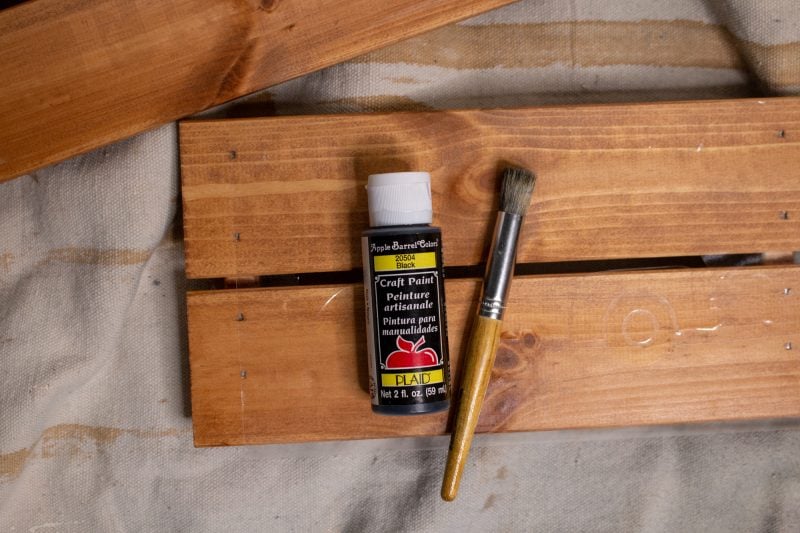
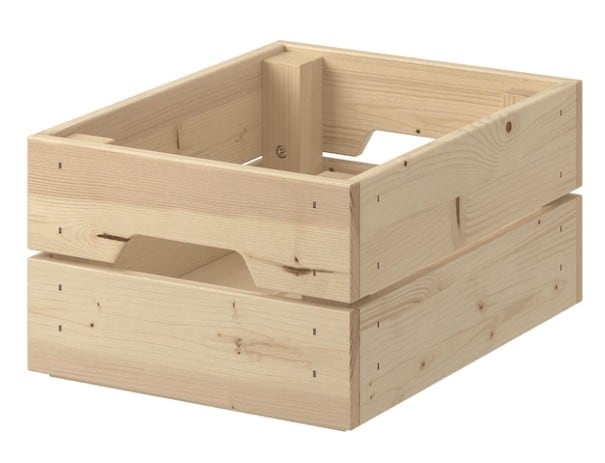
I made the stencils with my Cricut using clear contact paper for both stencils.
I used some black craft paint I had on hand and an old stenciling brush.

I pounced the paint on and once it was dry, I peeled off the stencils and voila - a stenciled garden crate.
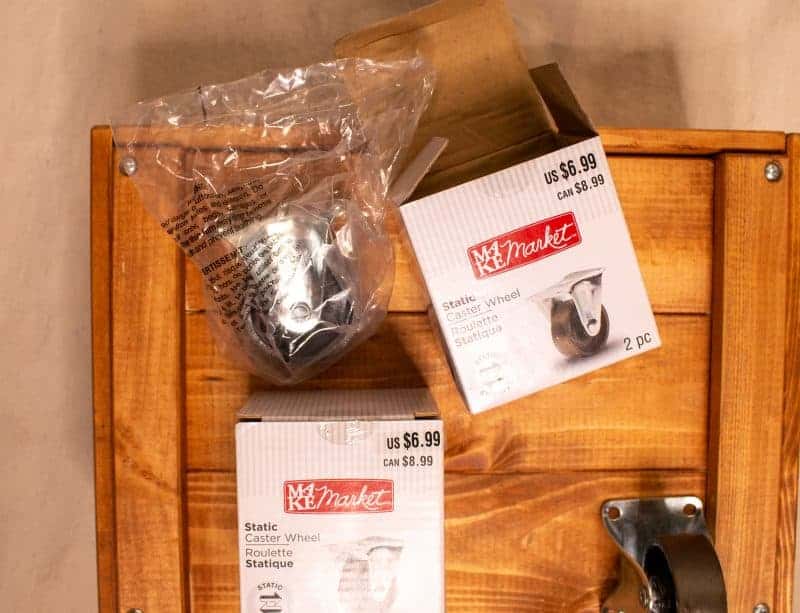
I added some caster feet I bought a few years ago on clearance from Michaels. I like the look of the casters and I also want to keep the bottom of the planter off of the surface it will be placed on so that water can properly drain, etc.
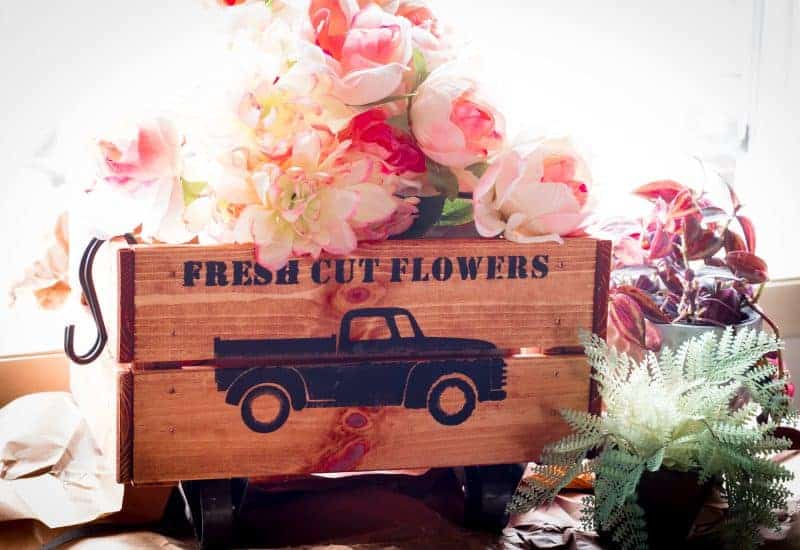
I plan on sealing the wood with an outdoor sealer so I can use this on my porch but for now, it's holding some houseplants.
I can't wait until I can head to the store again and buy some flowers and put this outside!
Expanding Your Plant Collection
And, remember that this is just one of many ways to display your plants. If you'd like to go all-in and have your own lush garden, consider good quality professionals like Boise Landscaping Company, who are the experts when it comes to landscaping Boise homes.


Mary Beth - what a transformation! Your adorable planter is perfect for Spring. This convinces us that we need a Cricut to create unique stencils!
Thank you so much, Vicki and Jenn! Have a wonderful spring. xo, mb
This is adorable, Mary Beth! It's great that you created two looks by using a different stencil on either side of the crate. This will be fun to use for decor in any season.
Thank you so much, Paula! Thanks also for putting this tour together...it's always WONDERFUL to work with you. xo, mb
I love this idea Mary Beth. You can never have too many flower containers and your added stenciling made this gorgeous DIY really stand out.
Thank you so much, Patti, and you are absolutely right...you can never have too many flower containers. Have a wonderful spring. xo, mb
I love crates on casters and what I cute idea to use one for a spring planter. The stenciling is perfect by the way. Well done!
Thank you so much, Michelle! Those silly casters were the hardest part of the whole project, which seems so ridiculous, but I didn't have a wrench so getting them on and tightened was a bit of a task. Note to self: when storms open again and shopping is allowed...by a set of wrenches! 😉 Stay safe and healthy. xo, mb
Awe this is so adorable! The wheels are the perfect finishing touch. And I love how you decorated it for spring! So happy to be on tour with you this week!
Thank you so much, Michelle, and it's wonderful to be touring with you as well. Stay safe and healthy. xo, mb
Mary Beth, I love your crate spring arrangement... and the $6 crate from IKEA is perfect! Pinned, and looking forward to joining the tour tomorrow! Be sure to link up at Tuesday Turn About!
Hello, Julie! Thank you so much and thank you as well for the Tuesday Turn About reminder. I'm coming over right now to link up. Have a lovely spring. xo, mb
What an adorable use of something you already had, Mary Beth! I haven't used my Circut in ages and it's one of the very first ones. You made me want to try something new with mine. Great job!
Thank you so much, Marty! I hope you get a chance to pull out and use your Cricut again. I had an original one and parted with it maybe 2 years ago, though sometimes, I wish I still had it. Have a lovely spring. xo, mb
What a sweet farmhouse crate, Mary Beth! I love how you repurposed it and placed flowers inside. So perfect for spring! I'm happy to be on this hop with you. Pinning!
Genius!! I would have never thought to put the castors on!! You took it to a whole new level my friend!
Mary Beth your stenciled crate is perfect for spring flowers and plants! Love this idea!
So fun hopping with you. Happy Easter!