
How To Dye Bottle Brush Trees
How-to dye inexpensive bottle brush trees to match your holiday decor. Simple, easy, and oh so shabby chic!
How To Dye Bottle Brush Trees
I love bottle brush trees and if you've been around here for a while you probably already know that. I want to start using them more in my Christmas decor but it seemed that I only find them in an off-white color and in a dark green. That's great for most purposes but I went with a lot of bold reds this year and I wanted some trees to match that. 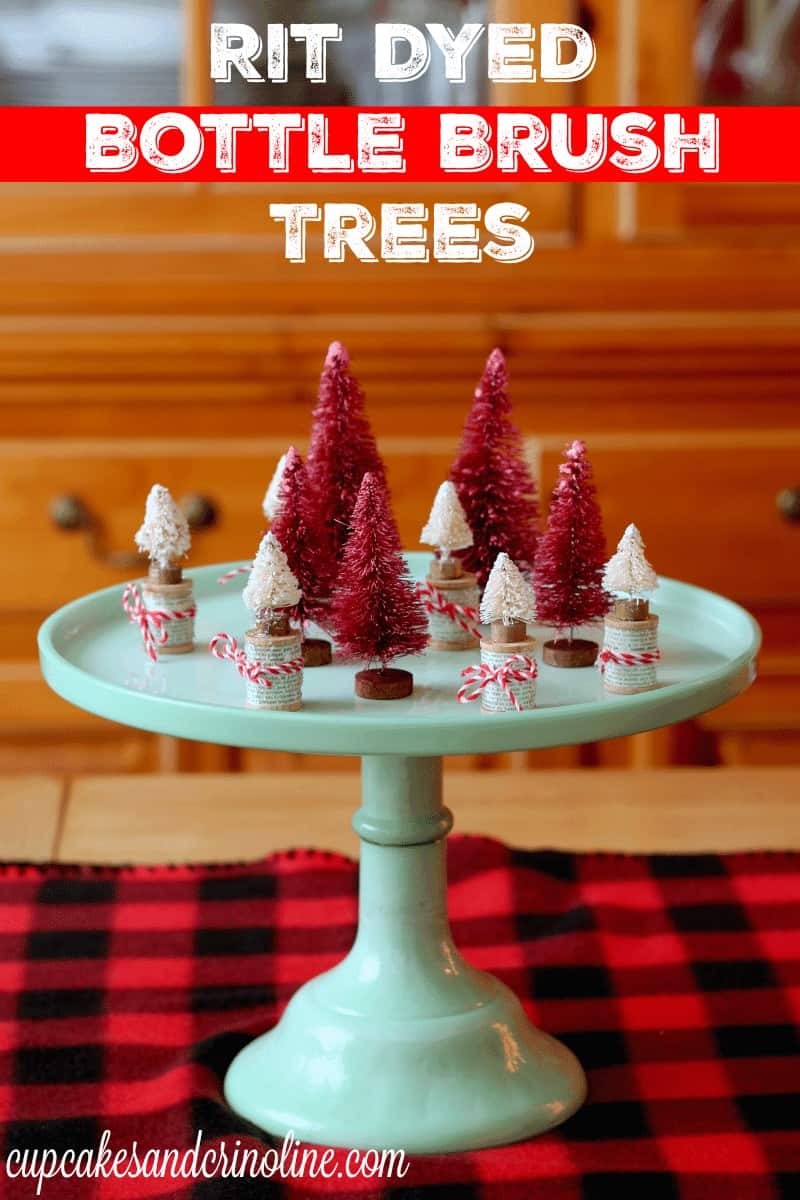 I thought I had a genius idea using Rit Dye for this purpose then realized it had already been done so while this isn't new to the world it's new to me and I want to show you how easy it is. *This post contains some affiliate links for your convenience. Click here to read my full disclosure policy.
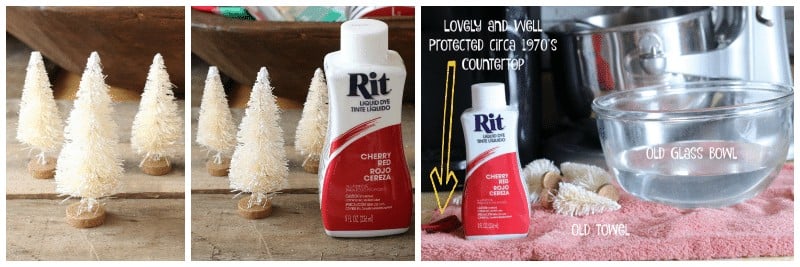
Supplies:
Rit Dye in color of your choice - I chose Cherry Red
Glass Bowl
Measuring Spoon
Hot Water
Old Towels
 Make sure your work surface is totally covered - dye will DYE everything it touches. I used an old towel to protect my lovely yellow 1970's kitchen counter. I figured if it had held on for over 40 years I should keep it unscathed 😉
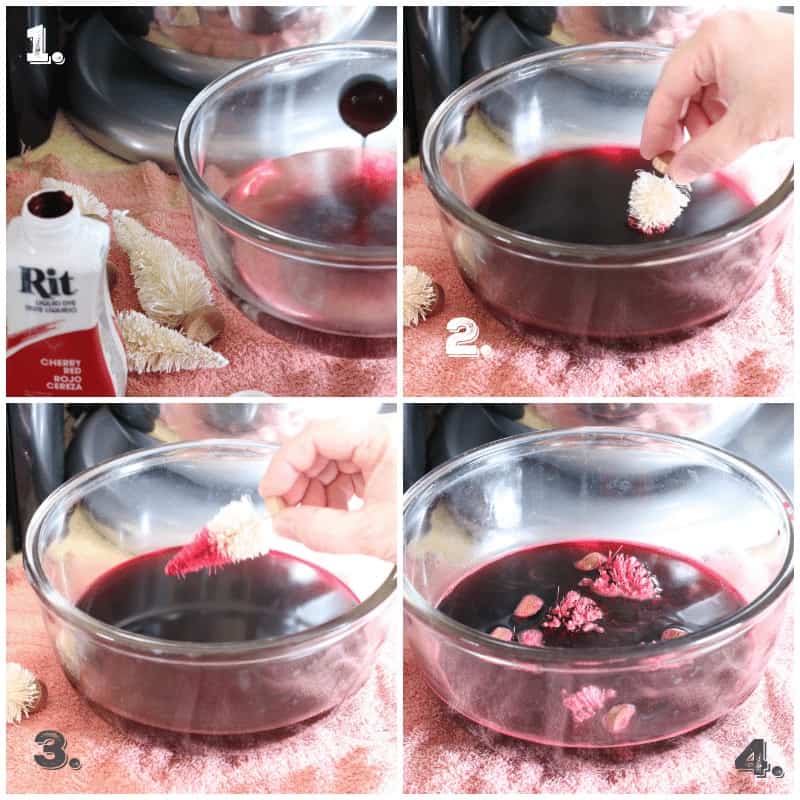
Fill your bowl with 2 cups of VERY HOT water and then stir in 4 teaspoons of Rit Dye (before opening the dye shake it well but shake it somewhere safe or at least make sure the lid is on SUPER TIGHT). A part of me thinks this whole process should be done outside because of Dye fear.
Now, add your trees. I partially dipped one and loved the way it looked. I should have done some ombre ones - note to self - try ombre for next year.
Place all of your trees in the water making sure they are submerged.
Leave them under water to soak up the dye for 5 to 10 minutes. The longer you leave them to soak the deeper the color will be. I left mine in for 10 minutes. Now, carefully drain the water from the trees and run cold water over everything until it runs clear.
Place your trees on a safe surface, i.e., crappy towel to dry.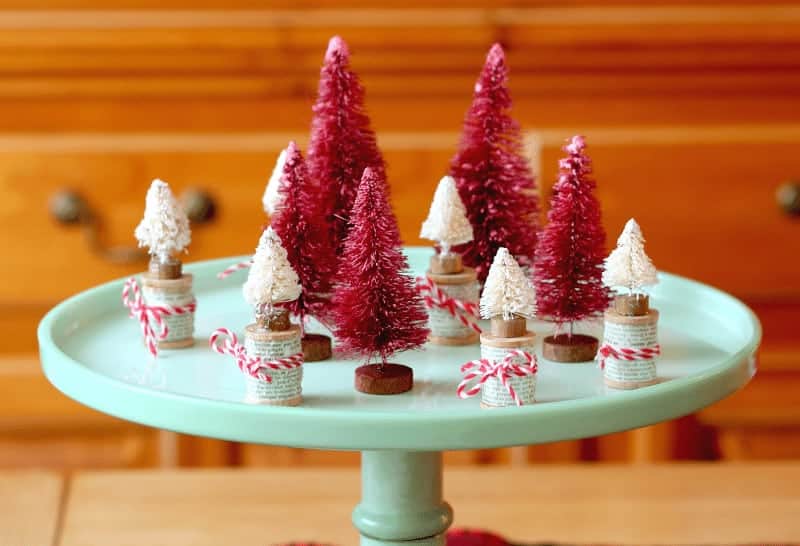 Once they're dry decorate to your heart's content! I didn't put any glitter on them yet but I think I will.

Here's a bit of a side note. The trees are an almost dusky maroon and not the deep rich cherry red I was hoping for. I think the problem was that I started with bottle trees that were off-white. I may try a bleaching process first and then try this again or I may just look for some white trees - we'll see! 
Some other posts you may like!
How to Make the Perfect Christmas Bow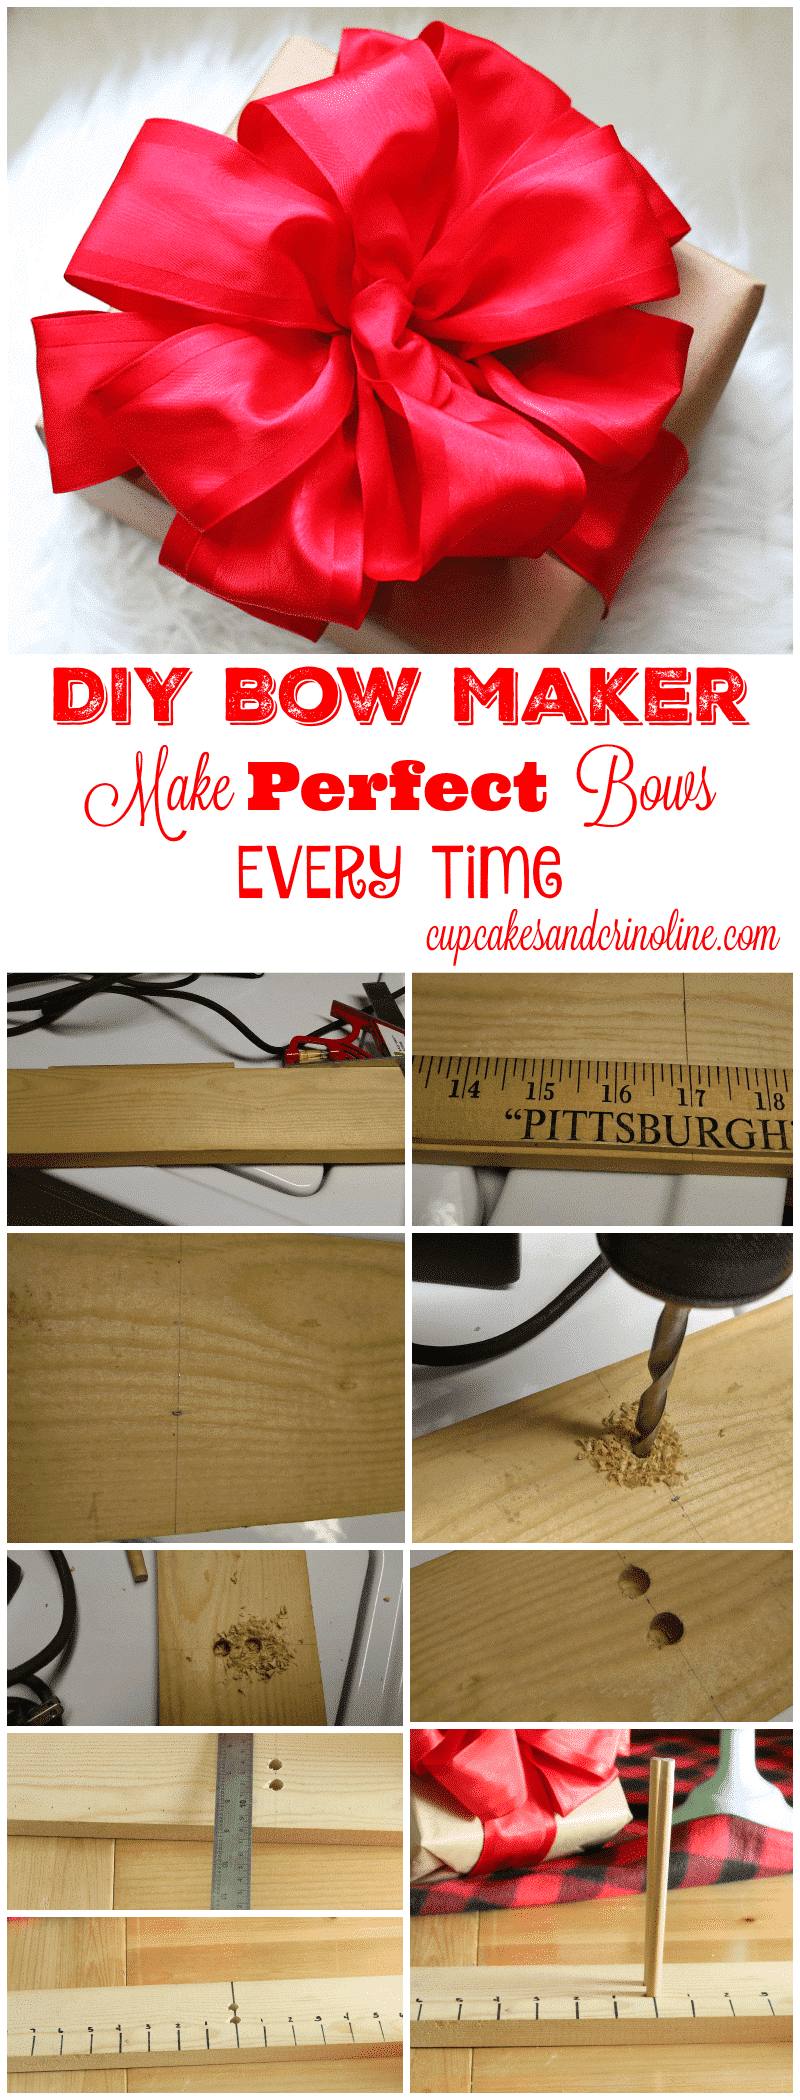 Mini Bottle Brush Tree Place Cards and Ornaments
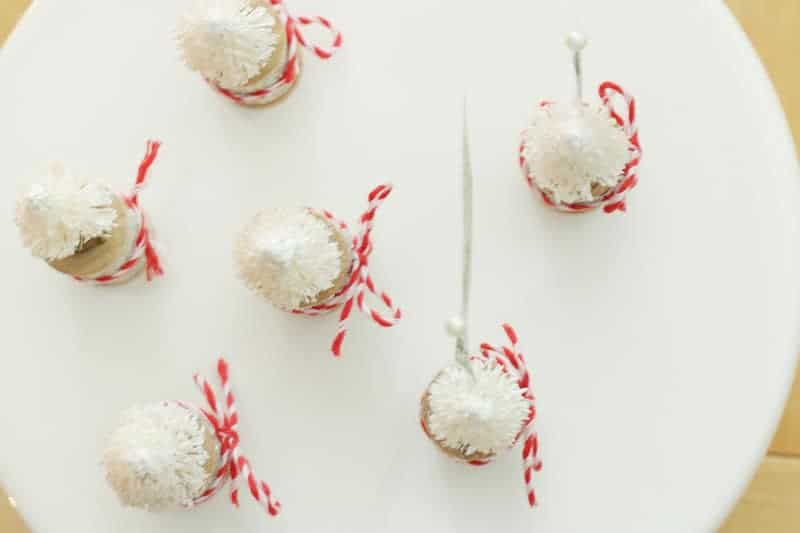


Awesome tutorial! I am an bottle brush tree addict! I have never seen red ones-- love what you did here. You could totally sell these on Etsy! Lovely!