
Easy Homemade Bread Recipe Using a Stand Mixer
Making your own bread has emerged as both a popular hobby and a health-conscious decision for many and this delicious white sandwich bread recipe using a stand mixer makes the process an easy one that can be undertaken every day!
Whether seeking the full-bodied texture of whole wheat flour or experimenting with alternative grains for a gluten-free sourdough bread, the kitchen has become a laboratory where homemade white bread and pizza dough is born, free from unwanted additives.
Key Takeaways:
- Control Over Ingredients: Home bread making enables the choice of every ingredient, ideal for those with dietary restrictions.
- Healthier Choices: By avoiding preservatives in store-bought bread, you're leaning towards a healthier lifestyle.
- Versatility in Bread Making: Experiment with various recipes, from classic white bread to gluten-free options, using your stand mixer.

Jump to:
*This post may contain affiliate links and I'll earn a commission if you shop through them. You can read my full disclosure here.
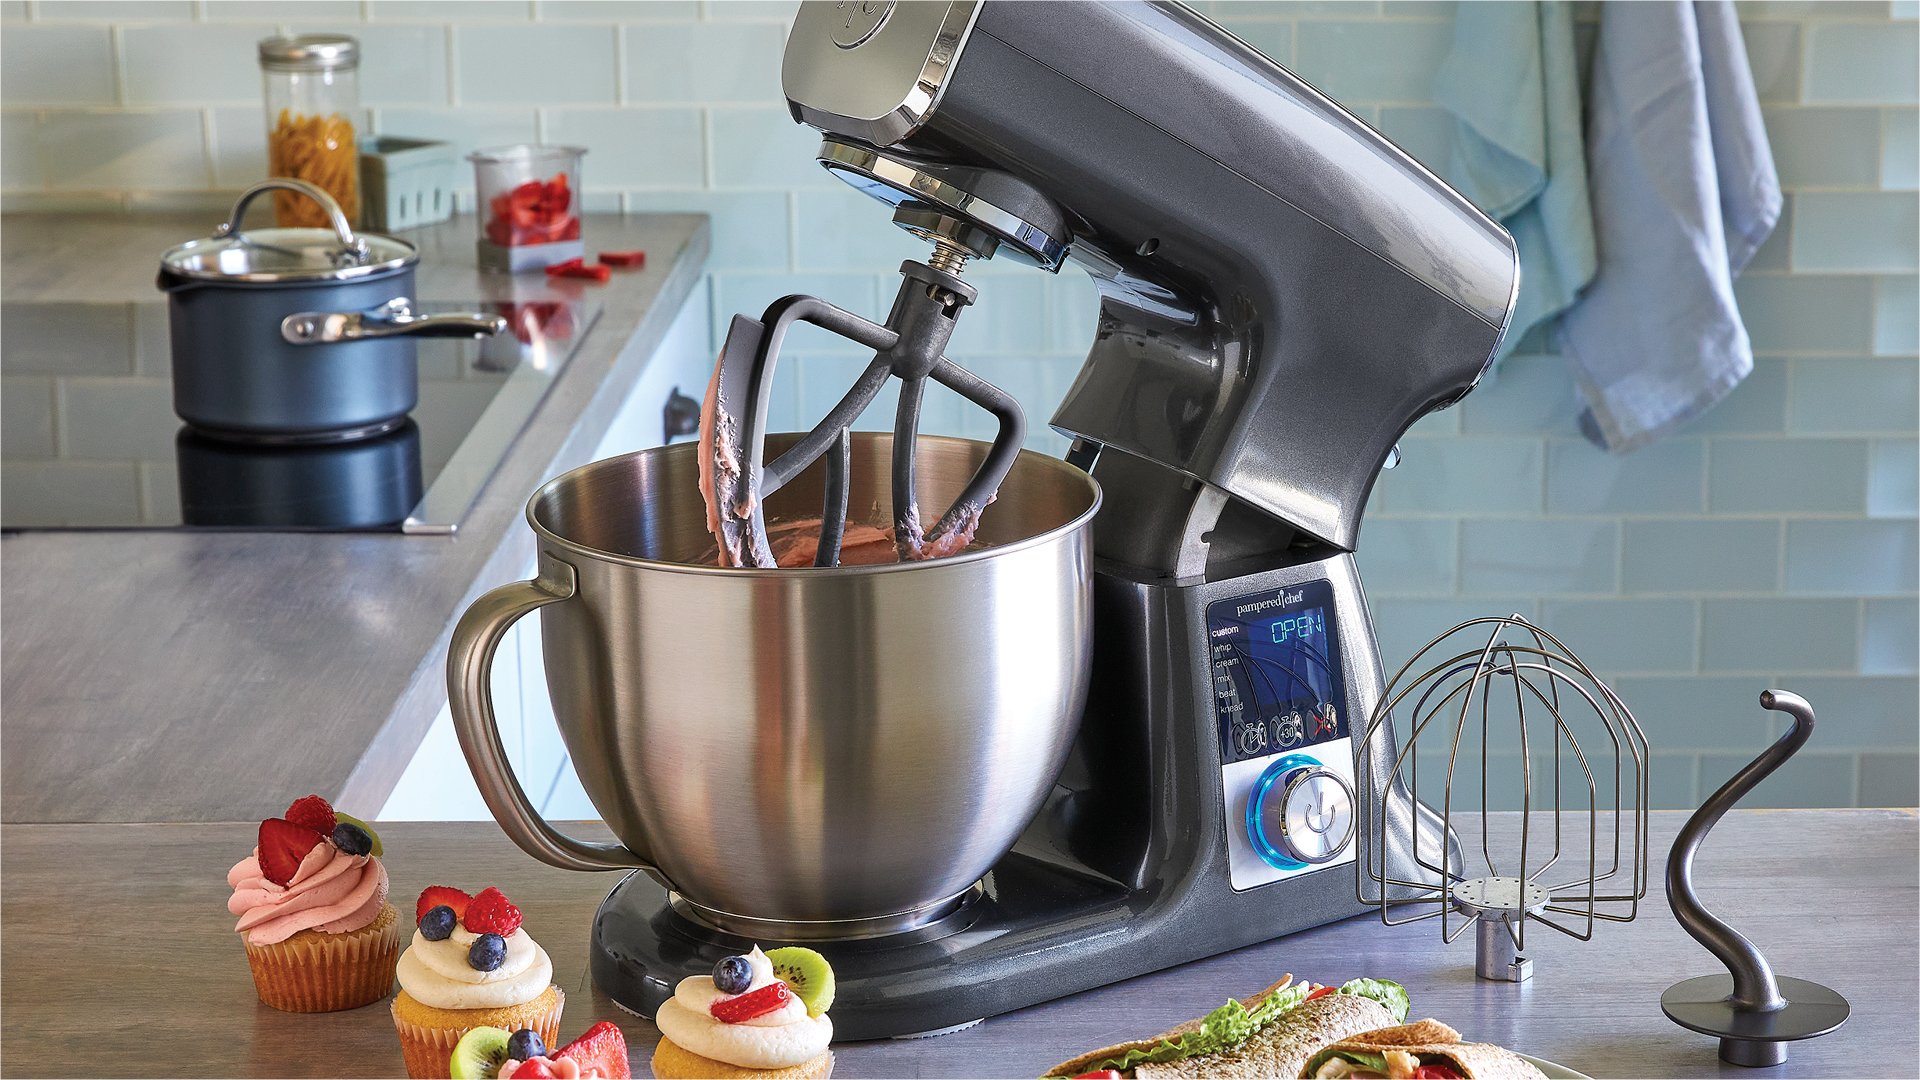
Why Use a Stand Mixer for Your Dough?

Using a stand mixer for kneading dough brings countless benefits. It dramatically reduces strain on your wrists, ensuring the process remains a joy rather than becoming a chore. A good quality heavy duty mixer, like the KitchenAid mixer, with its dough hook attachment, guarantees consistent results every time. This precision allows you to explore a range of recipes, from sourdough bread to soft, pillowy pizza dough. With the mixer's help, achieving the perfect dough texture becomes easier. It mixes at a consistent, low speed, enabling the ingredients, whether whole wheat flour or white flour, to fully integrate without overworking. Whether aiming for a crisp, golden loaf of homemade white bread or experimenting with homemade bread of any sort, the stand mixer emerges as an indispensable ally in the quest for
Gathering Your Bread Making Arsenal
To embark on the journey of


- A large stand mixer with a bowl and dough hook attachment will act as the foundation, blending your mixture to an even consistency.
- Measuring cups and spoons ensure precision, crucial for the delicate balance bread dough demands.
- Kitchen Scale: Precision is key in
baking . A kitchen scale ensures you get the exact measurements for ingredients every time. - Bread flour, instant yeast, and salt make up the trifecta of basic ingredients, setting the stage for the dough's rise and flavor.
- Warm water, often between 110°F to 115°F, will wake the yeast, prompting it to work its magic.
- Shortening will make your bread light and fluffy and lets it brown beautifully during
baking .
Ingredients

- warm water, 100-115°F
- active dry yeast
- sugar
- bread flour
- instant dried milk
- shortening
- salt
See recipe card for quantities and the full recipe.
Instructions

Add the water, yeast, and sugar to the stand mixer bowl and let it sit for 5 minutes until it's nice and frothy.

Add the remaining ingredients and knead on speed 2 if using a KitchenAid Stand Mixer and the KNEAD option if using the Pampered Chef Deluxe Stand Mixer.

Upon reaching this stage, place the dough in a greased bowl covered with plastic wrap in a warm place. This facilitates the first rise and is a crucial step, which demands patience but will define the texture of your homemade bread. Allow the dough this warm, draft-free area for 1 hour.

Preheat the oven to 400°F. Flatten the dough into a rectangle about 9" x 12" using your hands.

Fold the shorter sides toward the center into thirds and roll to form a 9" log.

Place the dough in a greased 9" x 5" loaf pain and let rise until the dough is above the edge of the pan, about 45 minutes to 1 hour.

Place in oven and bake until a gold brown, 15 to 18 minutes.

Remove from the pan and let cool completely on a wire rack before slicing.
Hint: Bake the bread as soon as the dough rises (after the second rise). Don't wait too long because the texture can be potentially altered and the loaf may collapse while
Kneading: Achieving the Perfect Texture

Kneading dough in a stand mixer is a game-changer, especially when striving for homemade bread with the perfect texture. It helps to ensure that the bread dough has a smooth and elastic consistency. Set the KitchenAid mixer to a low speed initially before adjusting to a speed of 2. This careful control allows the dough to develop the necessary gluten structure without tearing apart.
The kneading process is near complete when the dough clings to the side of the bowl initially but eventually cleans the sides of the bowl as it nears readiness. By observing this transformation, you can confidently conclude that the dough had been thoroughly kneaded.
Let It Rise: Finding the Perfect Spot
Ensuring the dough rises accurately is crucial in the bread-making process. A warm spot is the ideal location and can be achieved by placing the dough in a large bowl in a draft-free place. To prevent the dough from drying, it should be covered with plastic wrap, making sure it clings and offers a tight seal around the sides of the bowl.
Experts suggest that the temperature in the warm place should hover around room temperature, or slightly above, to encourage the perfect rise. This gentle warmth aids the yeast mixture in fermenting properly, leading to a soft dough that's primed for
Baking Your Bread to Perfection

Placing the bread dough in a preheated oven is key for that golden crust we all crave. For this homemade sandwich bread, you'll want a hot oven set to 400°F. It's the sweet spot where dough transforms into bread.
Dusting the top of the dough with a light flower of white flour or brushing with olive oil can enhance crust texture and color. After the oven has done its hard work, letting the bread rest on a wire rack assures it cools without turning soggy. Remember, patience at this stage rewards you with the best results.
Storage
Storing fresh-baked bread to keep it tasting its best involves a few key steps:
- Cool Down: First, allow your bread to cool completely before storing. Storing it while still warm can lead to moisture buildup, which might cause sogginess or mold.
- Wrap Properly: Wrap your bread in a clean, dry cloth or in a bread bag (cloth or paper) to allow it to breathe. Avoid plastic bags for long-term storage as they can trap moisture and make the crust soft. If you prefer a softer crust, then plastic might be acceptable for short-term storage.
- Room Temperature Storage: For short-term storage (a few days), keep the wrapped bread in a cool, dry place. A bread box or a cupboard away from direct sunlight or heat sources works well.
- Refrigerator: Generally, it's not recommended to store bread in the refrigerator as it can dry out and become stale faster due to the fridge's dehumidifying effects.
- Freezing: For long-term storage, freeze bread. Slice it before freezing if you want to toast or use individual slices directly from the freezer. Wrap it tightly in foil or a freezer-safe bag to protect against freezer burn. Frozen bread can last for several months.
Remember, the best method can vary depending on the type of bread and your personal preference for crust and texture. For freshly baked, crusty loaves like sourdough or baguette, keeping the crust crispy is usually the priority, while for softer breads like sandwich loaves, preventing drying out is key.
Related
Looking for other recipes like this? Try these:
You must use the category name, not a URL, in the category field.Pairing
These are my favorite dishes to serve with this delicious homemade bread!


📖 Recipe
Easy Stand Mixer White Bread Recipe
 Save Recipe
Ingredients
- ¾ cup warm water, 100-115℉
- ¼ ounce active dry yeast 1 package
- 1 tbsp. sugar
- 2 ½ cups bread flour
- 3 tbsp. instant dried milk
- 1 tbsp. shortening
- 1 tsp. salt
Instructions
- Add the water, yeast, and sugar to the stand mixer bowl and let it sit for 5 minutes until it's nice and frothy.¾ cup warm water, 100-115℉, ¼ ounce active dry yeast, 1 tbsp. sugar
- Add the remaining ingredients and knead on speed 2 if using a KitchenAid Stand Mixer and using the KNEAD option if using the Pampered Chef Deluxe Stand Mixer.2 ½ cups bread flour, 3 tbsp. instant dried milk, 1 tbsp. shortening, 1 tsp. salt
- Upon reaching this stage, place the dough in a greased bowl covered with plastic wrap in a warm place. This facilitates the first rise and is a crucial step, which demands patience but will define the texture of your homemade bread. Allow the dough this warm, draft-free area for 1 hour.
- Preheat the oven to 400°F. Flatten the dough into a rectangle about 9" x 12" using your hands.
- Fold the shorter sides toward the center into thirds and roll to form a 9" log.
- Place the dough in a greased 9" x 5" loaf pain and let rise until the dough is above the edge of the pan, about 45 minutes to 1 hour.
- Place in oven and bake until a gold brown, 15 to 18 minutes.
- Remove from the pan and let cool completely on a wire rack before slicing.
Notes
As with any of my recipes, calorie counts and nutritional information varies greatly depending on which products you choose to use when cooking this dish.
Nutrition


How long do I kneed the dough in the mixer?
Hi Marie,
Knead the dough for approximately 3 minutes, or until it clings to the hook and cleans the sides of the bowl. Continue kneading the dough 3-4 minutes longer. You’ll know it has been kneaded enough when it feels smooth and elastic.