
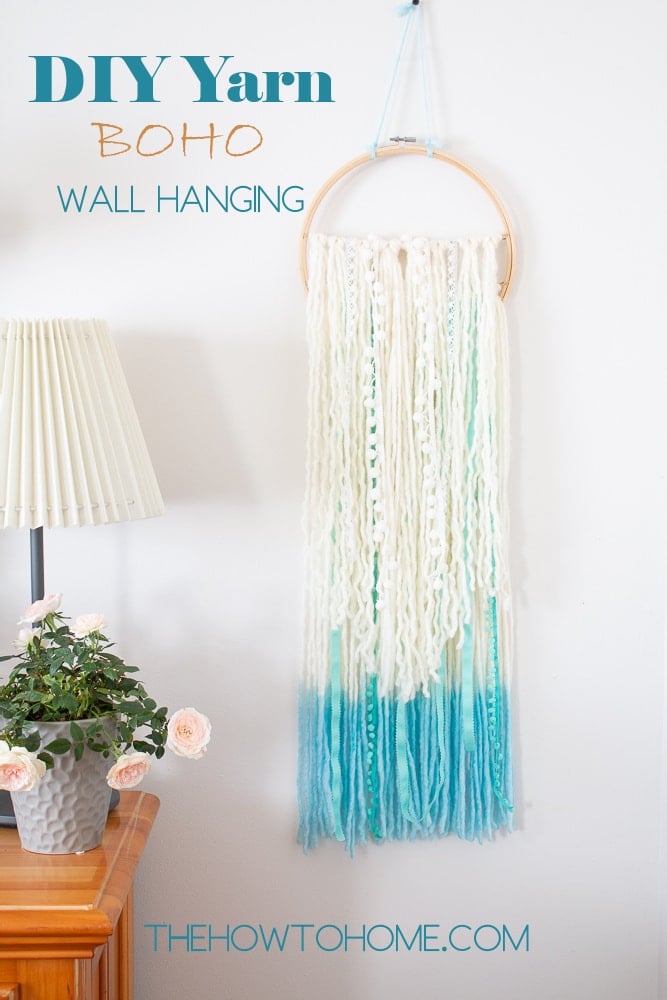
How to Make a Charming and Affordable Yarn Boho Wall Hanging
One of the things I enjoy most is creating affordable fun home decor and today I am thrilled to share this charming DIY Yarn Wall Hanging as part of this month's Thrifty Style Team.

DIY your own Yarn Boho Wall Hanging for a fraction of the cost of buying one!
DIY yarn wall art is a great way to be thrifty and on-trend at the same time with your wall and home décor.
At the bottom of this post you'll find links to the amazing shares from the other creative members of the Thrifty Style Team.
Things to keep in mind:
This DIY involves no macramé and no crochet or weaving skills and it doesn't require anything special like a wooden dowel rod.
You probably already have most of the supplies you'll need on hand in your craft stash but if not, I have provided links so you can easily and quickly get them.
Now, let's get to the details!
*This post may contain affiliate links and I'll earn a commission if you shop through them. You can read my full disclosure here.
How to Make a Yarn DIY BOHO Wall Hanging (Step by Step Tutorial)
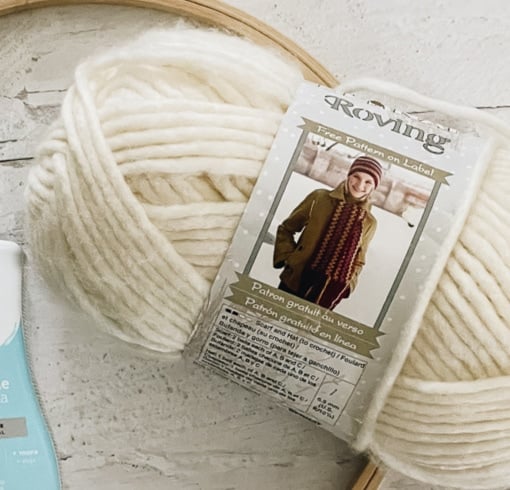
Supplies:
Bernat Roving Yarn - or a chunky yarn that is 80% acrylic and 20% wool. I chose a nice cream yarn color for this project. Roving Yarn is a thicker yarn which is what we want to give this yarn wall art a nice depth.
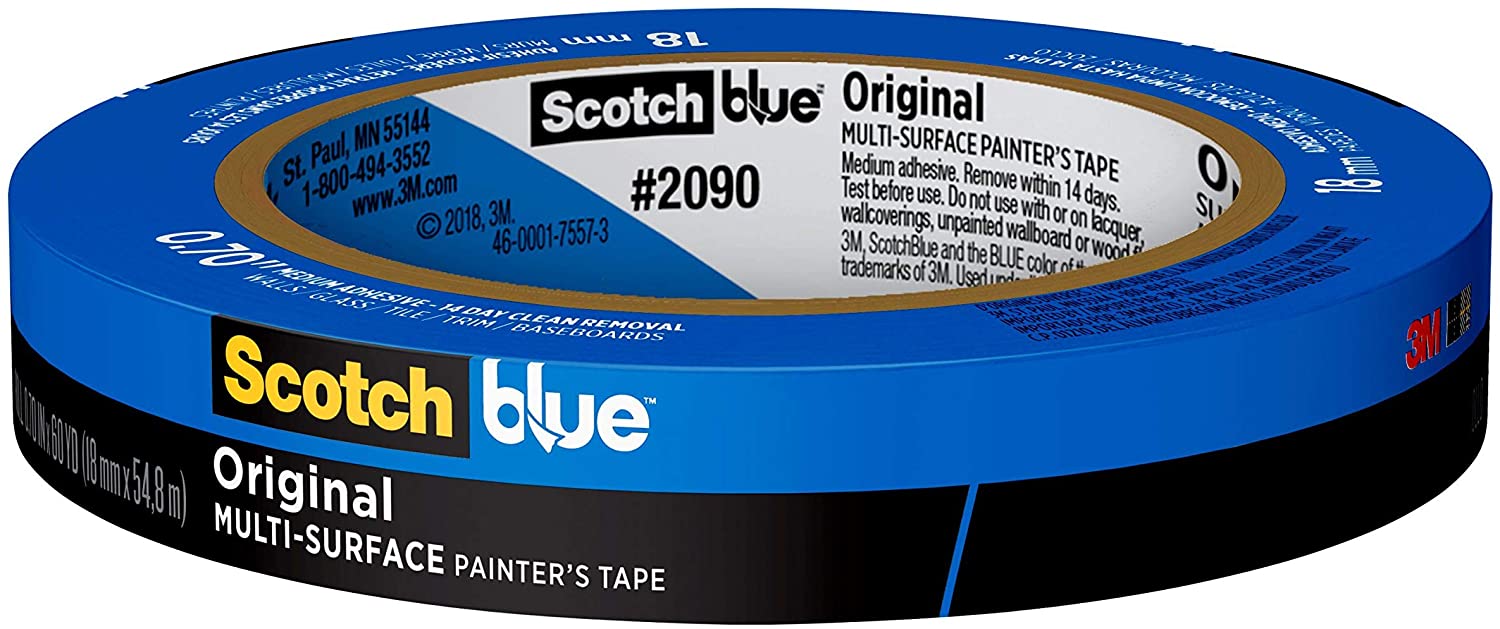
*Painter's Tape - optional
Instructions:

Gather your supplies.
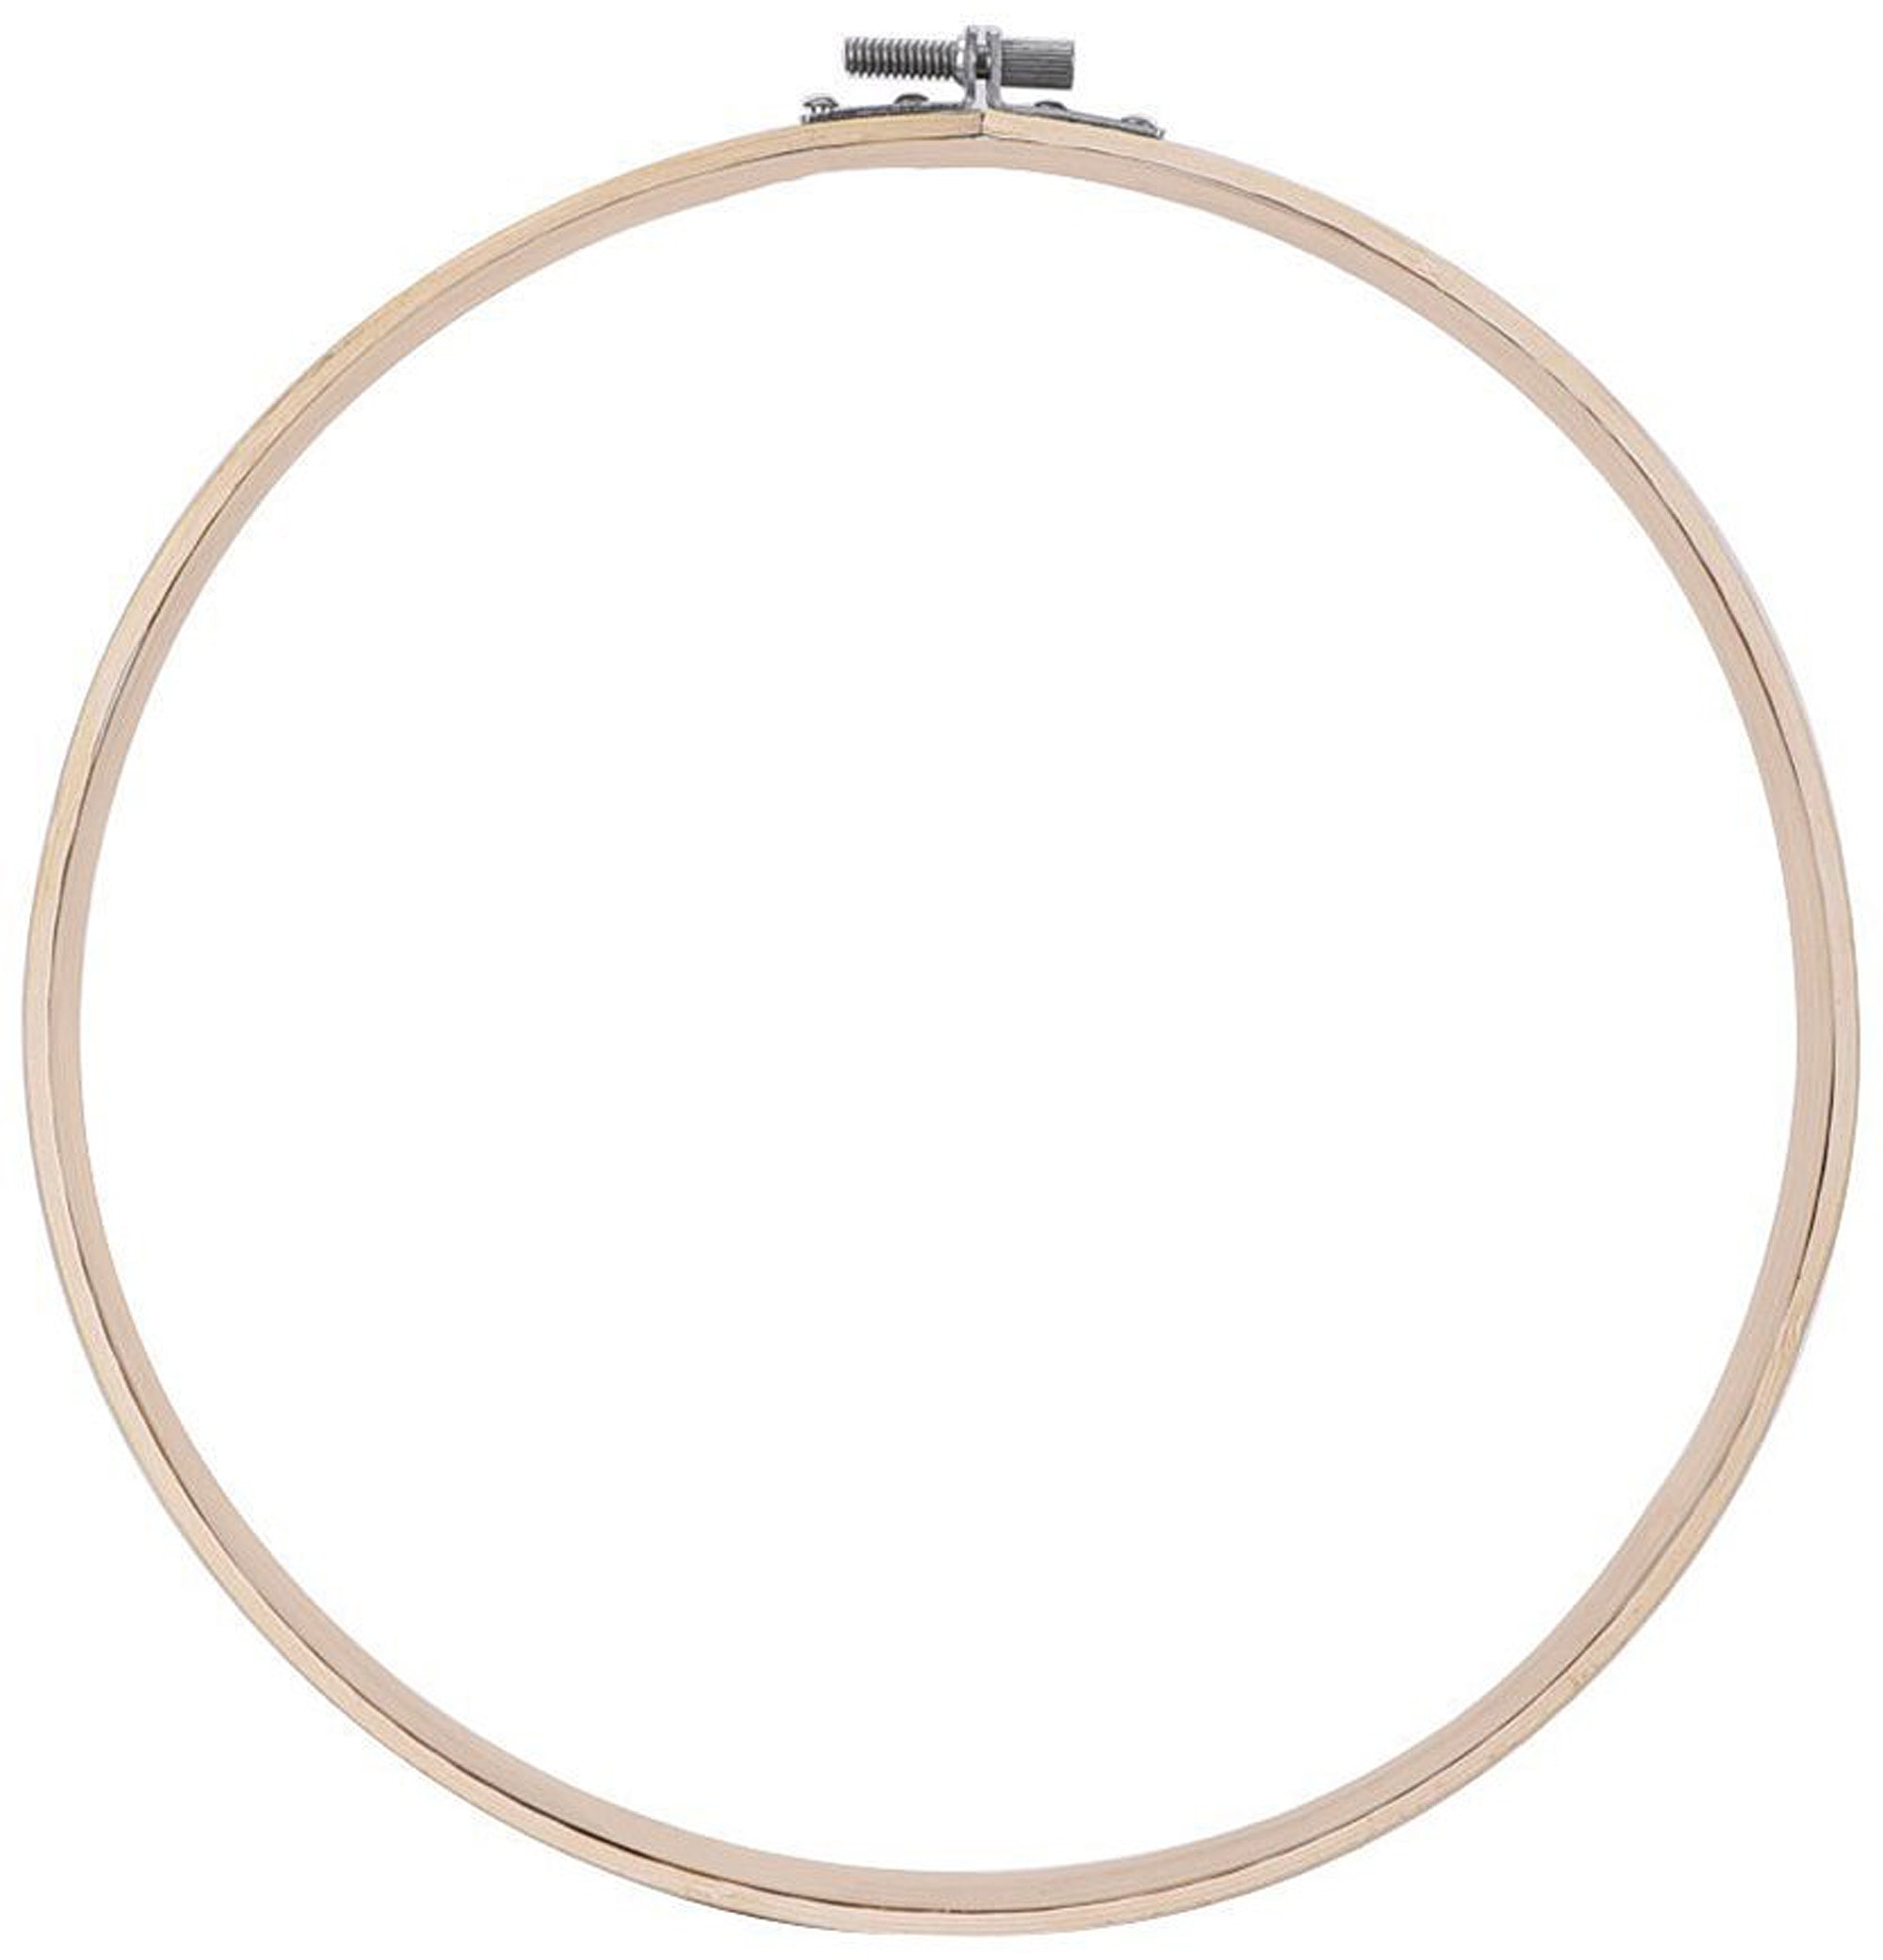
Start by separating the embroidery hoop inside from the outside and lay a length of wool across the middle of the larger ring. Allow a few inches to hang over for adjusting.
*Please note: In the photos, I used a piece of wool yarn but found that it wasn't strong enough to hold and adjust the bundles so I switched to natural jute twine for the final wall hanging.
Once the twine (or yarn) is in place, push the smaller ring into place inside the larger one so that that it is clamped tightly between the rings. You'll be adjusting and moving the twine throughout this process so don't worry if it's not perfect at this point.
Now, cut the yarn strands for the bundles.
The bottom layer bundle pieces of yarn are 72" long, with 5 pieces of yarn in each bundle.
Bottom Bundle: 5 pieces x 7 bundles = 35 strands, 72" each strand.
The top layer pieces are 48" long, with 4 pieces of yarn in each bundle.
Top Bundle: 4 pieces x 8 bundles = 32 strands, 48" each strand.
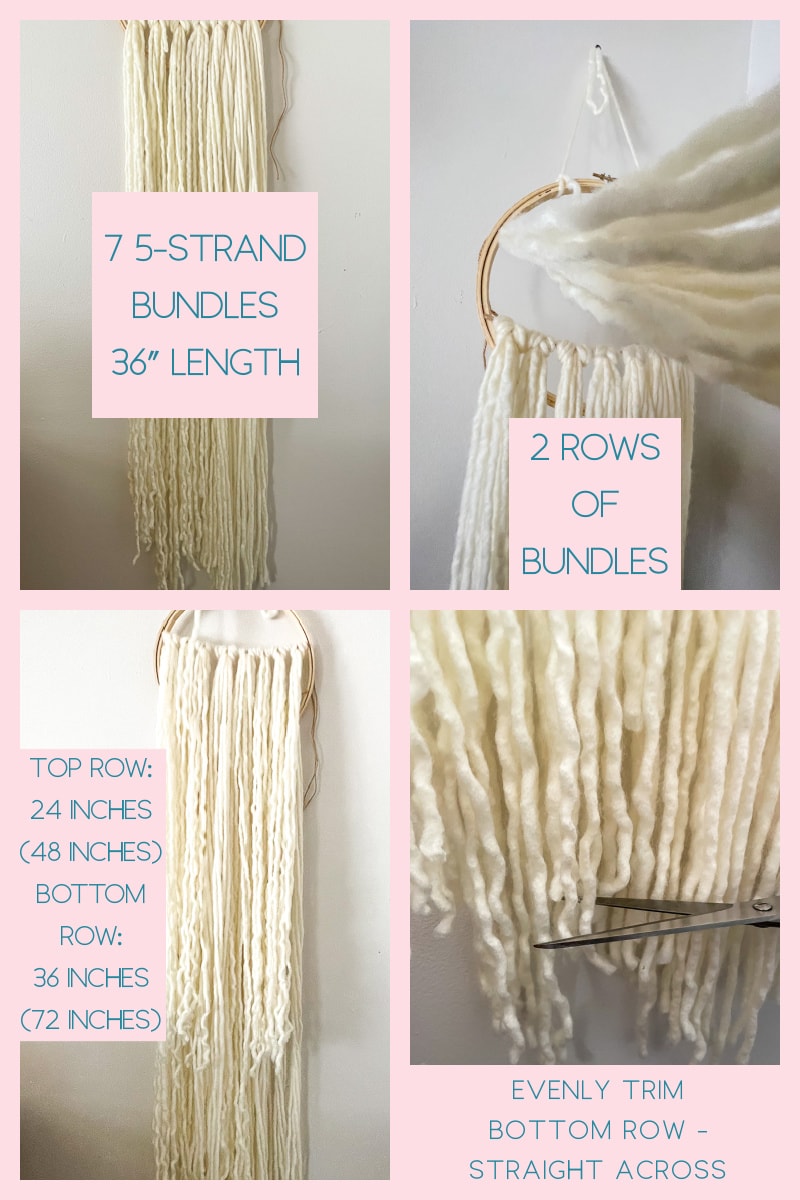
Now, attach each bundle to the tight string section. You'll be using a larks head knot for this step. Do this by folding each bundle in half (72" is now 36" and 48" is now 24") and pulling the ends through the loop that's created in the middle.
Continue adding bundles until the row is full.
Once the bottom row is complete, trim it evenly across with sharp scissors.
Repeat these same steps to create the shorter row of bundles for the top layer.

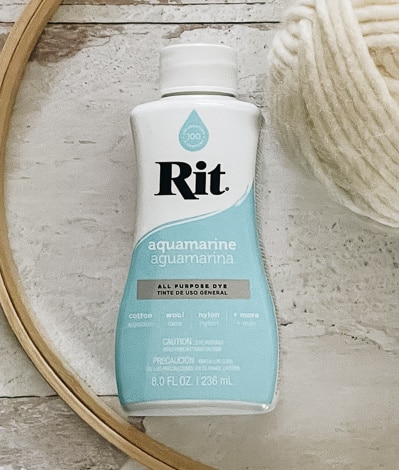
Next, it's time to dye the bottom few inches of the lower row of wool bundles.
Follow the directions that are on the Rit dye bottle carefully.
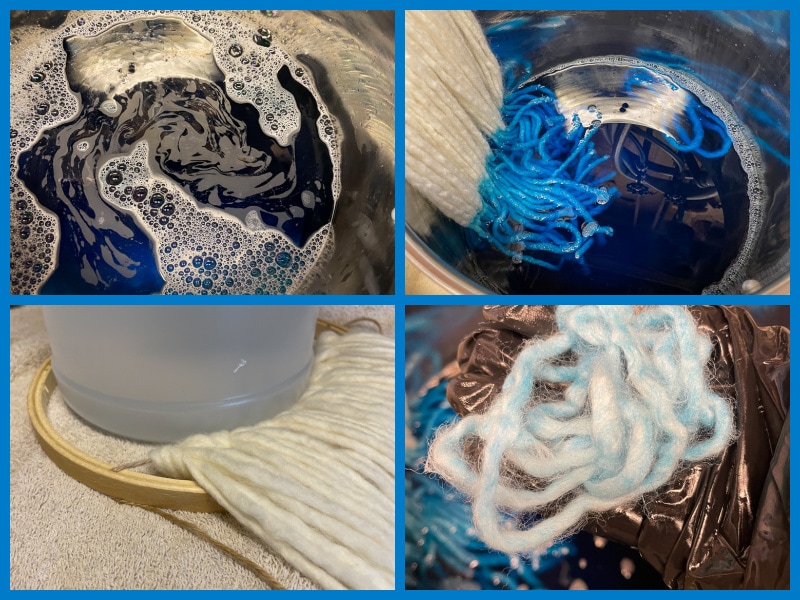
Once you have achieved the color you desire stop the dyeing process following the directions on the bottle.
Allow the dyed layer to dry before completing the assembly.
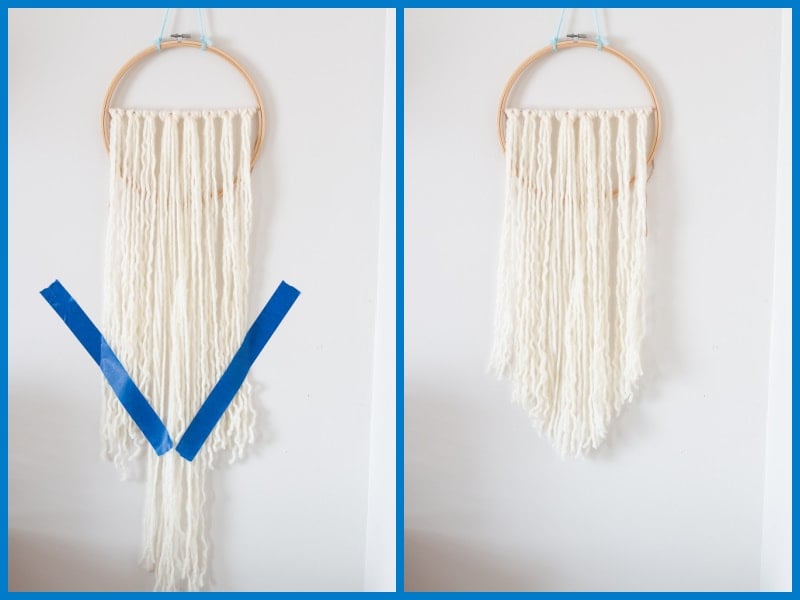
Before adding the bottom layer back to the wall hanging, cut the top layer in a V-shape.
I like to use painter's tape to hold the shape and then cut along the outer portion of the tape.
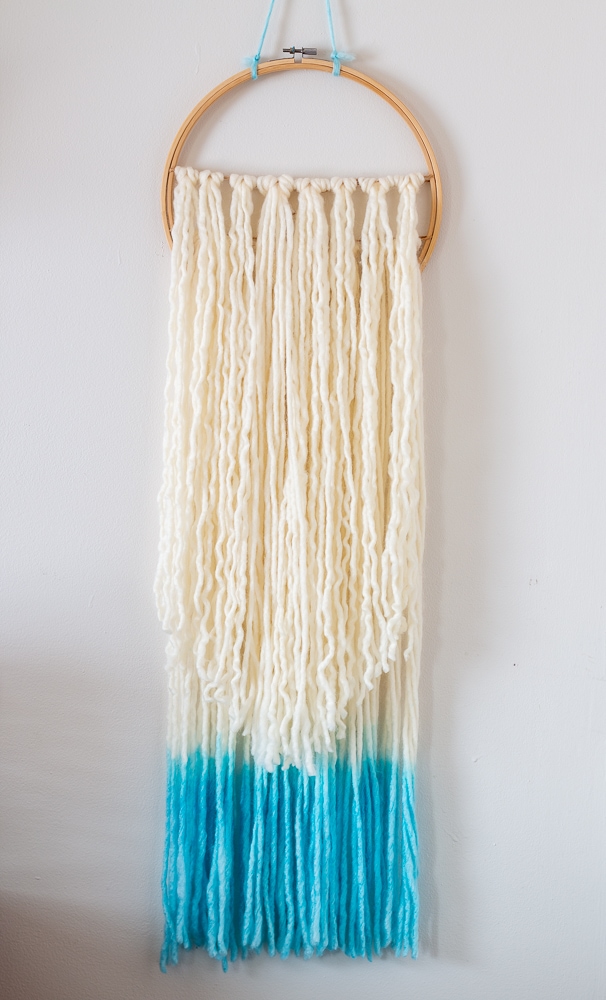
The above is the wall hanging assembled and plain.....
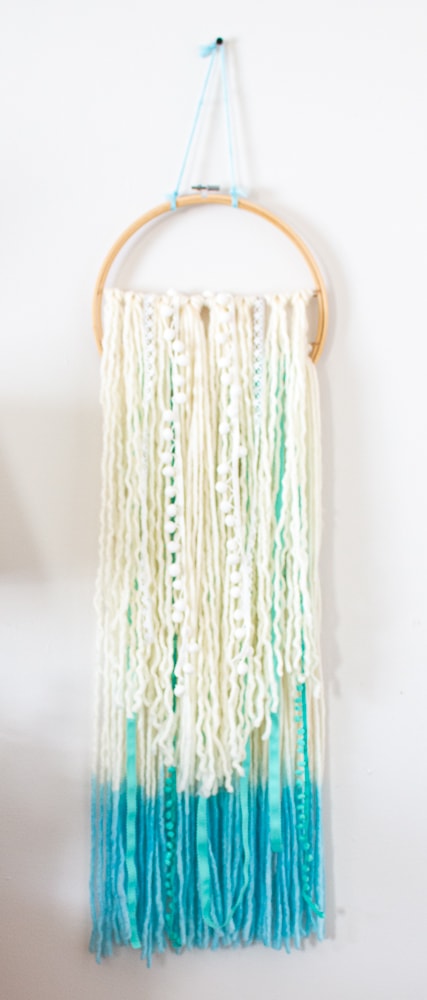
and here is the wall hanging with some doodads added from my stash.... lengths of ribbon and pom pom(s). I simply draped the extras over the yarn bundles holding each in place with straight pins.
I think I will change it up throughout the year and have already tested it with some red pompoms that I think will be perfect for the upcoming patriotic holidays!
I thought of adding a tassel (or 2 or 3) or a large wooden bead to the center of the V-shaped row but I like the way it looks now, so I'll leave well enough alone.
More Thrifty Style!
Time to grab a cup of coffee or tea and check out all of the inspiring shares from the rest of the team.
Just click the links below to be taken to their posts and thank YOU so much for stopping by The How To Home.

Redhead Can Decorate - Clever Bathroom Tissue Dispenser Ideas
The Painted Hinge - 5 Tips for Thrifting on Facebook Marketplace
DIY Beautify - Curbside Pink Table
2 Bees In A Pod - 10 Thrifty Decorating Ideas for Spring
The How To Home - DIY Yarn Boho Wall Hanging
The Tattered Pew - 25 Budget Friendly Home Decor Projects
What Meegan Makes - Spring Vintage Bicycle Rime Wreath
Cottage At The Crossroads - Farmhouse Lazy Susan with Wood Beads
Lora B. Create & Ponder - Fun Ways to Use Vintage Finds in your Outdoor Decorating
White Arrows Home - DIY Vintage Inspired First Aid Kit Box
Our Crafty Mom - Soy Teacup Candles DIY
Chas' Crazy Creations - Acrylic Paint Ideas DIY Mug Rack
Cottage On Bunker Hill - Vintage Spring Porch Decorating Ideas
If you would like to learn more about dyeing using other methods, the posts below may provide the crafty info and inspiration that you're looking for:
You can see all of my other Thrifty Home Decor Ideas here.


Oh my goodness! This is so pretty and looks amazing with any style. I love the easy to follow tutorial and can't wait to make my own. I love Boho style for my guest bedroom. Thanks for sharing! I am excited to give it a try soon.
Thank you, sweet Meegan!
What a cool project Mary Beth! I have used wool roving before but didn't realize it came as a yarn as well! I love how it curls!
Thank you, Cindy! I have never used roving wool before but I was pleasantly surprised. It was so soft. I wish I knew how to knit, I'd definitely make something to wear with it.
Very creative! Great idea to use an embroidery hoop. Awesome boho vibe!
Thank you, Lora!
What a beautiful DIY! My daughter would love this in her room!
Thank you, Kristin!
I love how this turned out! It looks amazing and I love the layers and color you added. Thank you so much for sharing.
Thank you so much, Chas!
I love this so much! The colors you chose for it are amazing!
Thank you, Michelle! that color is one of my favorites and while I don't have any other decor in that color, I love the "pop" it gave to my plain white wall.
MRy Beth this is just beautiful! I love that you added color too. My daughter would love this in her room! Gorgeous!
Thank you so much, Kelly!
Mary Beth, this is simply gorgeous! I love the look of macramé but would not have the patience to make my own. You have simplified things to get the same look! You are so talented, my friend!