
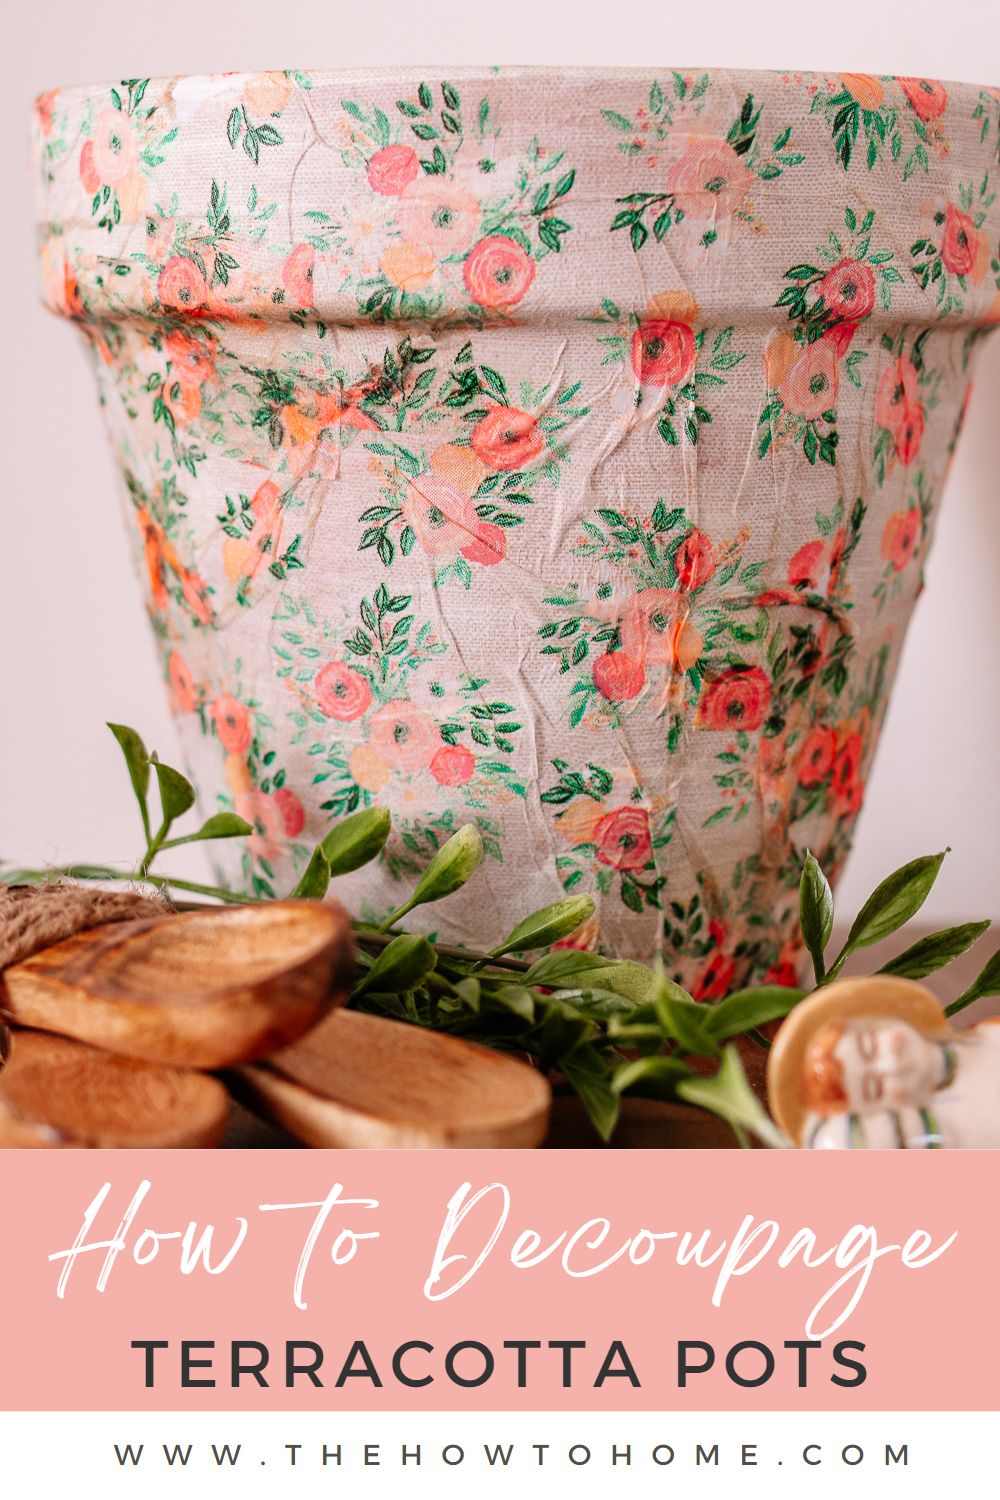
How to Decoupage a Terracotta Pot with Paper Napkins: 5 Easy Steps
Decoupaging a terracotta pot with a pretty paper napkin is one of my all-time favorite spring crafts. It costs next to nothing, takes less than 30 minutes, and the result looks like something you'd find at a boutique shop for three times the price.
I discovered this trick years ago when I spotted the most beautiful Rachel Ashwell shabby chic napkins at HomeGoods and immediately knew I had to put them on a pot. Now I make these every spring and they make wonderful Mother's Day gifts too. If you can brush on some Mod Podge, you can do this. Let me show you exactly how.

*This post may contain affiliate links and I'll earn a commission if you shop through them. You can read my full disclosure here.
What You Need
Here's everything you need to decoupage a terracotta pot at home:
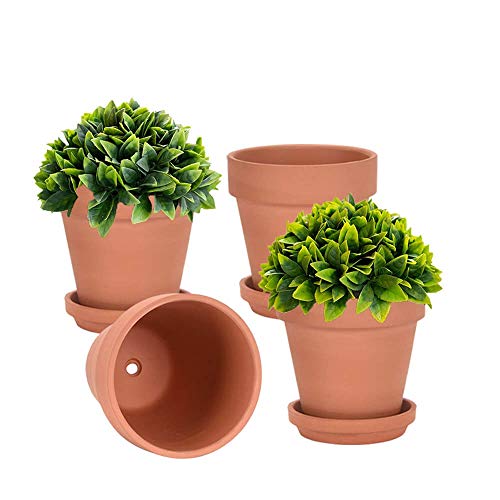
- 4 Inch Terracotta Plant Pots with Saucer - 6 Pack Clay Flower Pots with Drainage -- 4-pack of 6-inch clay pots with saucers -- great value, perfect for this project
- Mod Podge (dishwasher safe formula)-- Use dishwasher safe so it can handle occasional watering without peeling
- Foam sponge brushes -- Foam brushes give a smoother, bubble-free finish than regular paintbrushes
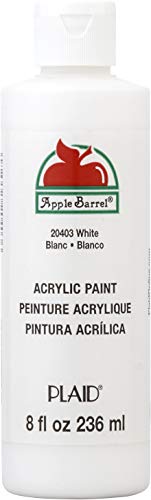
- White acrylic craft paint -- Apple Barrel or any basic white -- this is optional but recommended
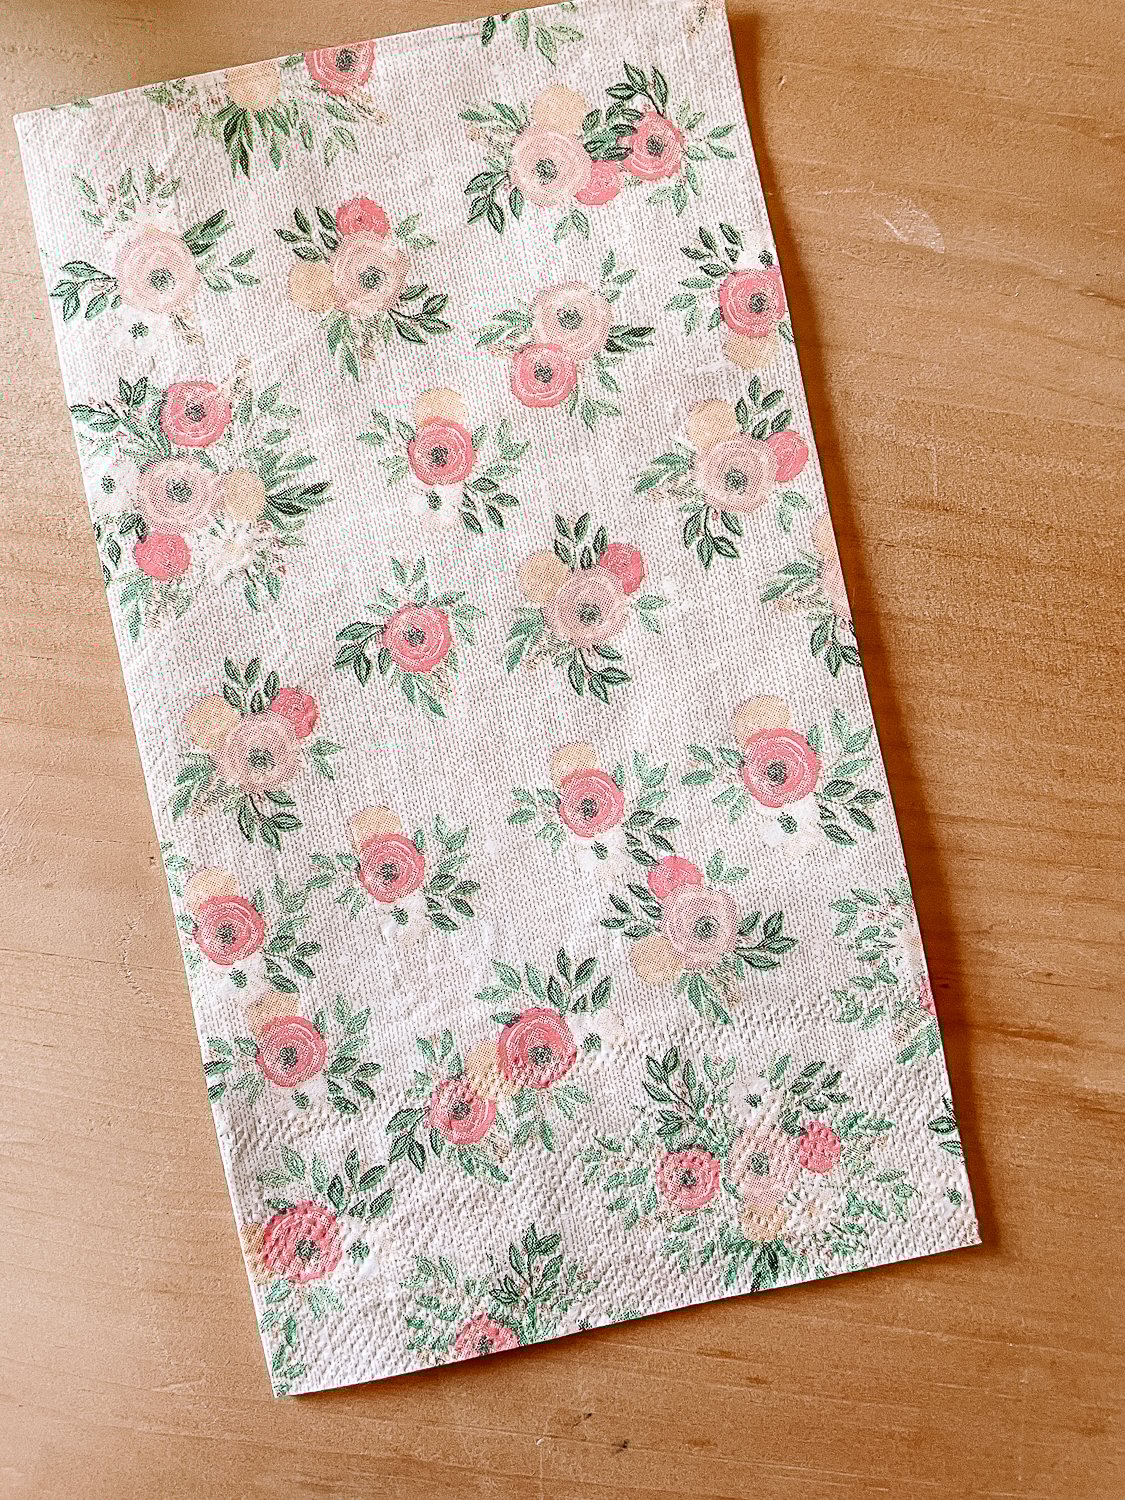
- Decorative paper napkins -- Floral, vintage, or botanical prints work especially well


Where to Find the Best Napkins for This Project
The napkin you choose makes or breaks this project, so this is worth a little thought. Here's where I look:
- HomeGoods, TJ Maxx, and Marshalls -- seasonal floral and vintage prints show up here constantly and they're usually $3-5 for a full package
- Craft stores like Michaels and Hobby Lobby -- dedicated decoupage napkin sections, huge variety
- Amazon -- search 'paper napkins for decoupage' for a massive selection. Botanical, shabby chic, and cottagecore prints are all excellent for spring
- Thrift stores and antique shops -- vintage cocktail napkins with old-fashioned florals are stunning on terracotta
Pro tip: Look for napkins with an all-over pattern rather than a centered design. All-over prints are much easier to work with on a curved surface and the wrinkles blend in beautifully.
How to Decoupage a Terracotta Pot: Step-by-Step
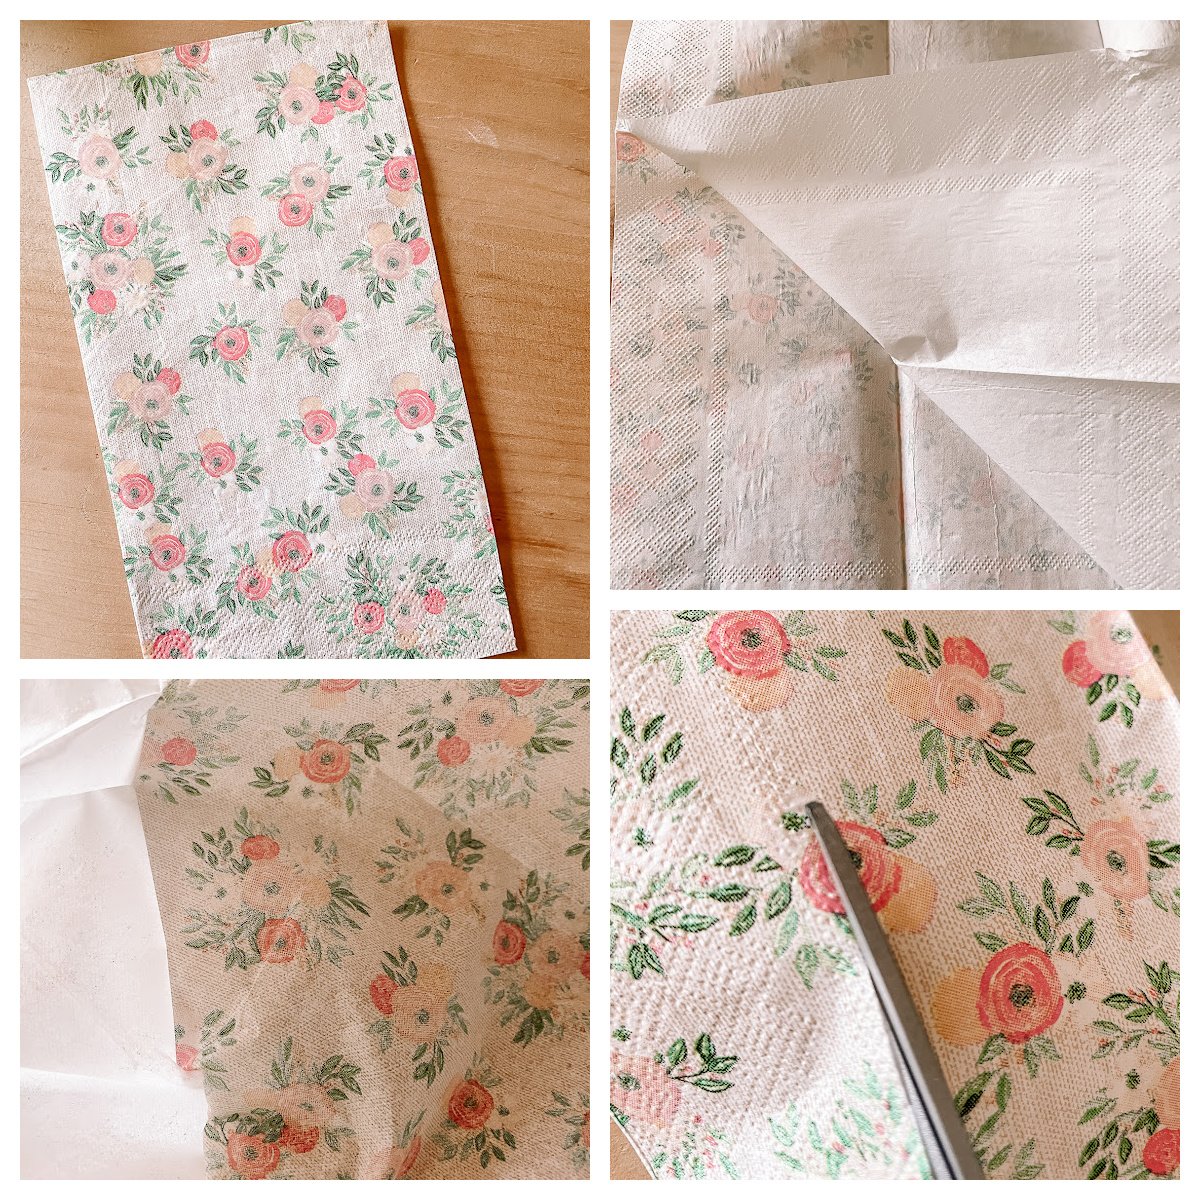
Step 1: Separate the Napkin Layers
This is the most important step and the one most people skip -- which is exactly why their napkin tears or looks blurry. Most paper napkins have three layers. You only want the top decorative layer.
Carefully peel the layers apart starting at one corner, working slowly so the thin decorative layer stays intact. Once separated, set the two plain white layers aside (you can use them later as a base layer if needed). If your napkin has a decorative border you don't want, trim it away now with scissors before you start.
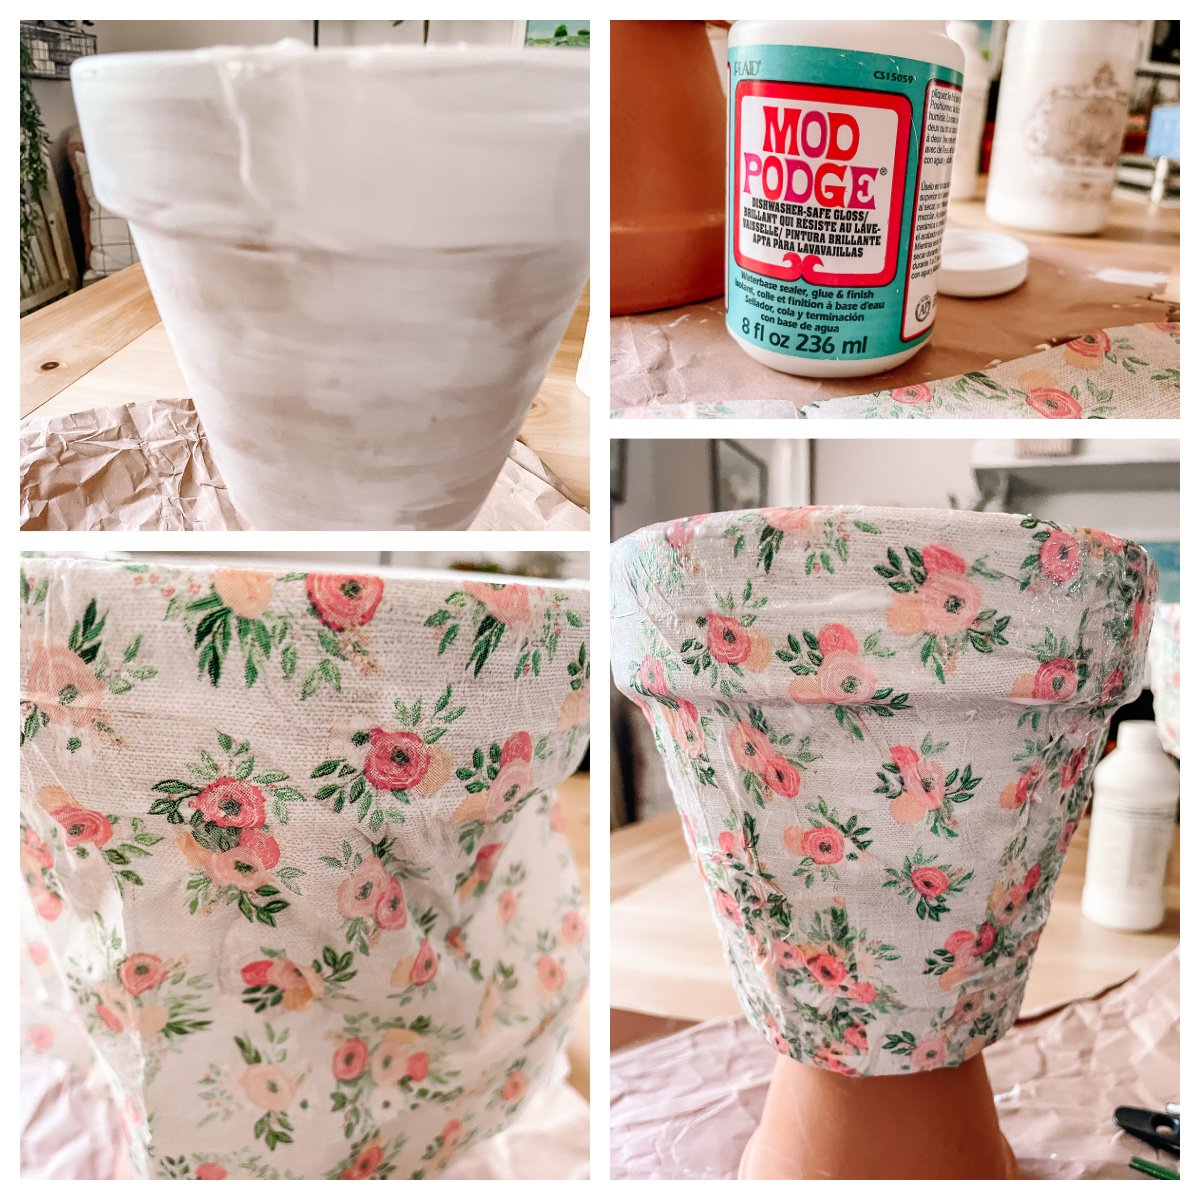
Step 2: Paint Your Pot White (Optional but Recommended)
Terracotta is a warm orange-brown color that can show through lighter napkin prints and muddy the colors. A quick coat of white acrylic paint fixes this completely. Apply one coat with a foam brush, let it dry fully (about 20-30 minutes), and then move on. You don't need full coverage -- just enough to create a neutral base.
Step 3: Apply Mod Podge to the Pot
Using your foam brush, apply a generous, even coat of Mod Podge over the entire outside surface of the pot, including the top rim and about an inch down on the inside. Work in sections if you need to -- you want it wet enough that the napkin adheres immediately when you press it down.
Step 4: Apply the Napkin
This is the heart of the decoupage terracotta pot process. Place the decorative napkin layer against the wet Mod Podge and start pressing it down gently from the center outward. The curved shape of the pot will create some wrinkles and folds -- this is completely normal and actually adds to the handmade charm of the finished piece. Don't fight the wrinkles; smooth them as flat as you can but don't stress over them.
For larger pots, work in sections. Tear the napkin into smaller pieces and overlap them slightly as you go. The overlapping seams become nearly invisible once sealed.
Step 5: Seal with a Top Coat of Mod Podge
Once the napkin layer is dry (give it at least 30 minutes), brush a smooth, even top coat of Mod Podge over the entire surface. This seals the napkin, protects the print, and gives it a lovely finished look. Let it dry completely before using.
For pots that will be used outdoors or watered frequently, apply two to three top coats, letting each one dry fully before adding the next. The dishwasher-safe formula of Mod Podge holds up well to moisture.
Tips, Tricks, and Troubleshooting
My napkin is tearing as I apply it.
The napkin layer is too thin to pull and stretch. Instead of repositioning it, press it gently in place and smooth out any lifting edges with a dry finger before adding more Mod Podge.
The print looks blurry or washed out.
This usually means the paint base coat was skipped or the Mod Podge layer under the napkin was too thick. Use a thin, even coat of Mod Podge and always apply the white base coat first.
There are air bubbles under the napkin.
Use a soft brush or your fingertip to gently smooth outward from the center while the Mod Podge is still wet. Small bubbles usually disappear as it dries.
The napkin is peeling at the rim.
Apply a small amount of Mod Podge with a detail brush and press back down firmly. Hold for 30 seconds. Seal well with an extra top coat over that area.
Can I use this pot outdoors?
Yes, with a few extra top coats of dishwasher-safe Mod Podge and an optional spray of outdoor Mod Podge sealer over the finished pot. Bring it in during heavy rain or freezing temperatures to extend its life.
Design Ideas and Variations
Once you get the hang of it, you'll want to make a dozen of these. Here are some of my favorite napkin themes to try:
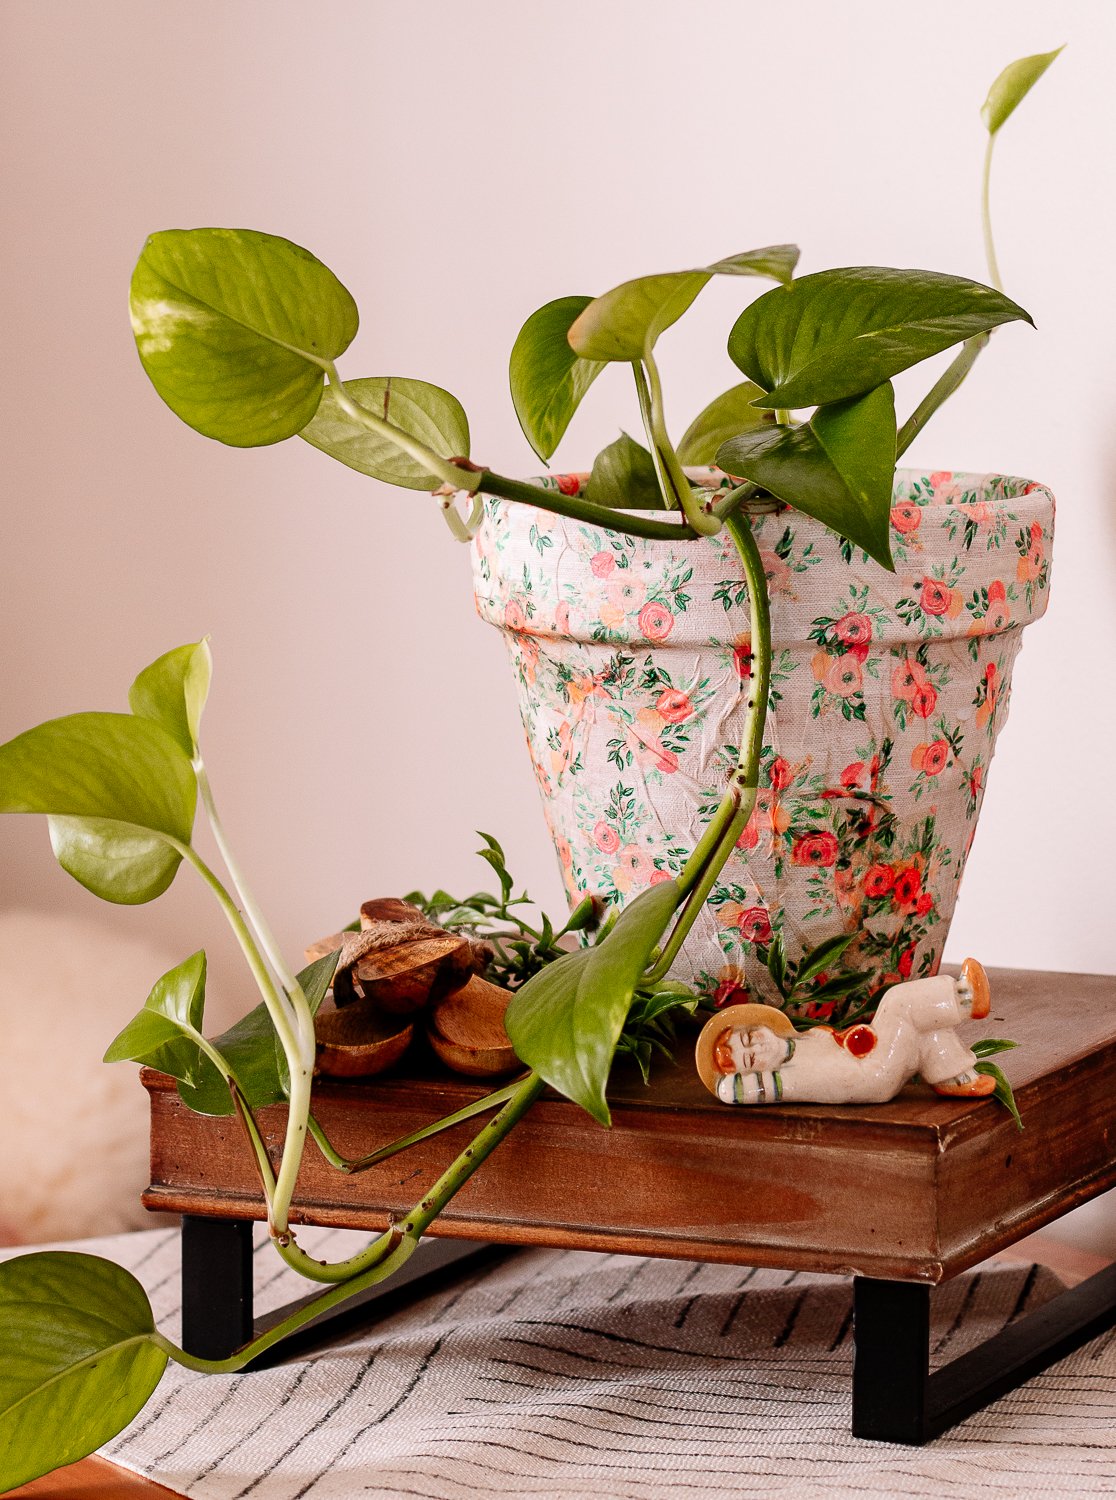
- Gift-worthy -- nestle a small succulent or herb inside the finished pot and wrap with a ribbon for an instant Mother's Day or housewarming gift
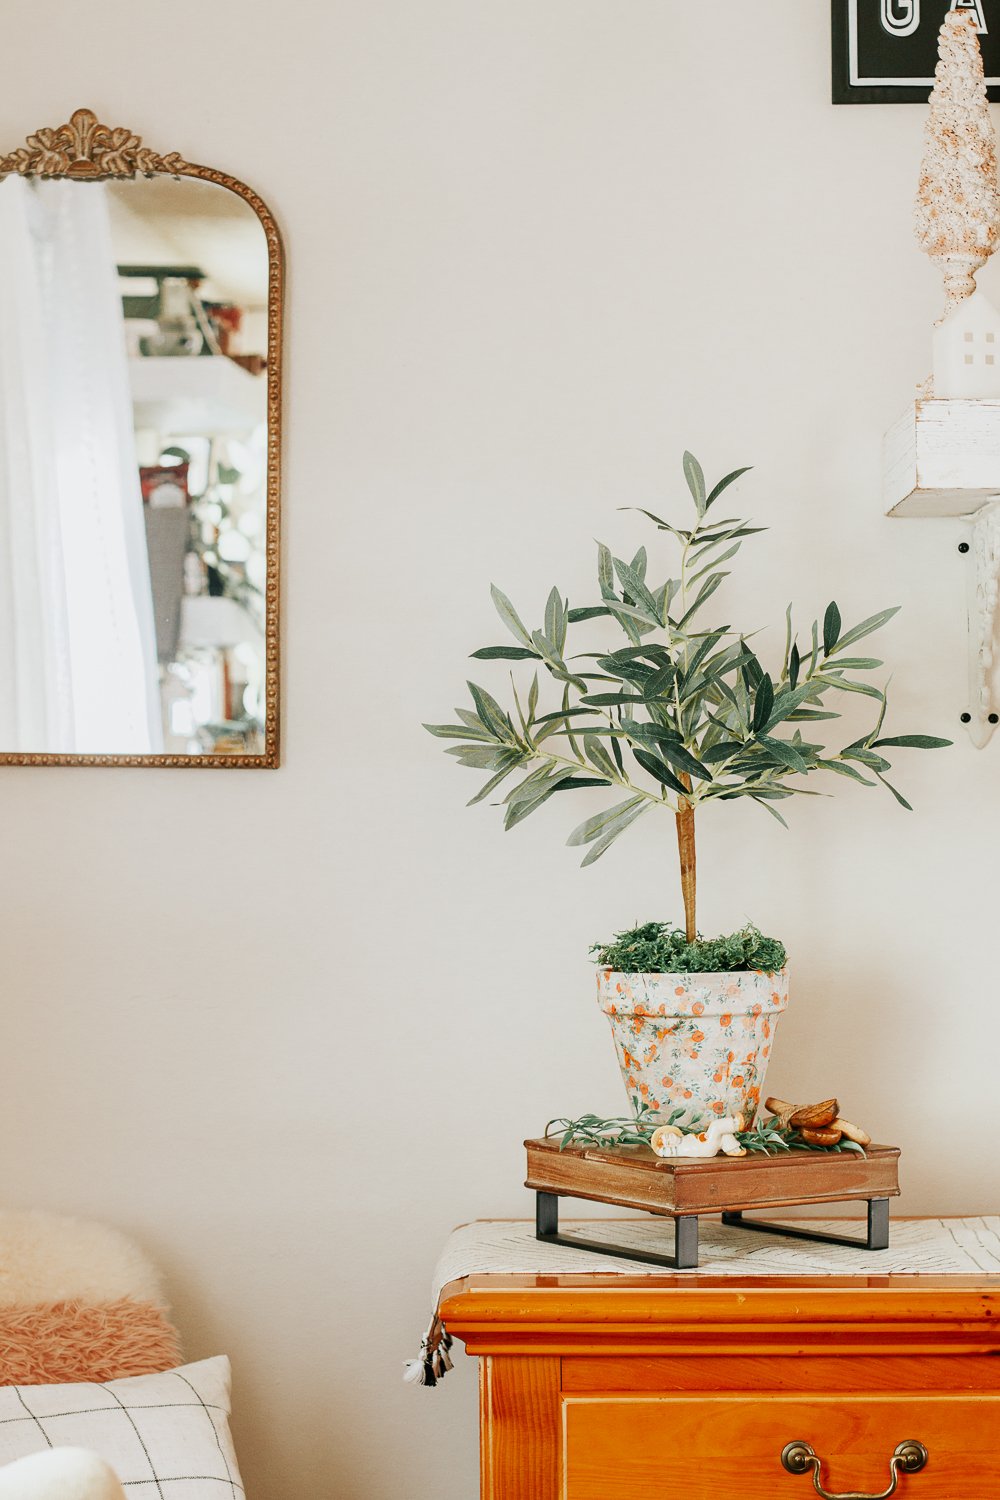
- Spring florals and botanicals -- perfect for a windowsill herb garden or porch planter
- Vintage toile or French country prints -- gorgeous for a farmhouse or cottage kitchen
- Boho or earthy leaf prints -- beautiful for a natural, organic home vibe
- Seasonal themes -- pumpkins for fall, snowflakes for winter, florals for spring, citrus for summer
- Coordinating a set -- use the same napkin on three different pot sizes for a cohesive display
Indoor vs. Outdoor Use: What You Need to Know
Standard Mod Podge (even the dishwasher-safe formula) is designed primarily for indoor use. For pots that will live outside year-round, here's how to make them more durable:
- Apply at least three top coats of Mod Podge, letting each dry completely
- Finish with a spray of outdoor-grade Mod Podge or a clear acrylic sealer rated for outdoor use
- Avoid leaving decoupaged pots in standing water -- use a saucer but empty it after rain
- Bring pots inside during freezing temperatures, as the freeze-thaw cycle can cause cracking and peeling
More Fun Terracotta and Craft Projects
If you loved this project, here are a few more to try next:
- Make Your Own Apothecary Jar
- How to Make a Copper Planter from a Clay Pot
- How Often to Water Indoor Plants
Frequently Asked Questions
Can you use any Mod Podge for decoupage on terracotta?
Yes, but dishwasher-safe Mod Podge is the best choice for terracotta pots because it creates a more durable, moisture-resistant finish. Regular Matte or Gloss Mod Podge works fine for purely decorative pots that won't be watered.
Do I have to seal a terracotta pot before decoupaging?
You don't have to, but painting a base coat of white acrylic paint first is highly recommended. It creates a neutral background that makes your napkin print pop and prevents the terracotta color from showing through lighter designs.
How long does a decoupaged terracotta pot last?
With proper sealing and indoor use, a decoupaged pot can last for years. Outdoor pots will last a season or two with good sealing, but may need a touch-up if exposed to heavy rain or freezing temperatures.
Can I decoupage on a pot that already has a plant in it?
It's best to decoupage the pot before planting. Working on an empty pot gives you a smooth surface to press the napkin against, and you won't risk getting Mod Podge on your plant.
What kind of napkins work best for decoupage?
Three-ply paper cocktail napkins with an all-over print work best. The thin top layer separates cleanly and conforms to curved surfaces without tearing. Avoid napkins with a thick texture or embossed pattern, as these don't adhere as smoothly.
Can I use tissue paper instead of napkins?
Yes! Tissue paper works very similarly to paper napkin layers and gives a slightly more transparent look. It's especially beautiful over a colored base coat.
You've Got This
This decoupage terracotta pot project is one of those crafts that looks impressive but is secretly so simple. Once you make one, you'll be making them for every room in the house. Grab a pack of napkins the next time you're at HomeGoods and give it a try this weekend.
If you make one, I would absolutely love to see it! Drop a photo in the comments below or tag me on Instagram so I can share it. And if you found this helpful, please save it to your Pinterest boards. It helps more people find the tutorial!


This is such a great project MB, and I love the pattern of the napkin!
Thank you so much, Cindy! I'm going all Little House on the Prairie and now I want an apron with that same pattern! xo
Yessss! These colors are so happy! I love a variety of pots around!
Thank you, Amy, and I love your description of the colors being happy...they really are!
Now that's a super cute idea!! I've been trying to paint big planters all day and nothing has gone right for me..now the skies opened up and we are getting a thunderstorm...I give up!!
I am so sorry that you weren't having success with your planter painting, Jennifer. Hopefully, you got some good weather in the last few days and were able to create what you hoped for.
You can’t get any cuter than this! I love the pattern you chose, MB! Pinning!!
Thank you so much, Julie! xo
OMG Mary Beth - tis is so cute. We could see these as party favors for a garden party!
You have such great ideas! These would be pretty for a garden party...now, maybe I should have one...or, just dream about it. xo
Mary Beth, I adore that flower print napkin you used for the decoupaged pot. The colors and flowers are so sweet and are perfect with your decor. Pinned!
Thank you so much, Angie! I have more of the napkins left but I hate to use them...so, I'll do my norm and just stack them on a shelf and look at them.
Such a sweet idea, Mary Beth! I have lots of extra terra cotta pots and now want to try this! Perfect for summertime. xoxo, kristi
Thank you so much, Kristi!
I love this sweet project! The colours are so pretty!
Thank you so much, Laurie! xo
Mary Beth this is so pretty and I love Rachel Ashwell too! Such a lovely pattern!