
Ribbon Organizer ~ Recycled Tin Can
Recycle a tin can into a pretty and useful ribbon organizer. Perfect for the craft room. This would also work great in the kitchen for twine or string.

Here's a quick, easy, and inexpensive ribbon organizer for all your pretty ribbons! And, if you like crafting with tin cans, you might just love this adorable Pumpkin Buddy!
*This post may contain affiliate links and I'll earn a commission if you shop through them. You can read my full disclosure here.
Jump to:
I use tin cans for a lot of crafts around my house. I love to punch holes in them using my Crop-A-Dile or a nail {if the area can't be reached with the Crop-A-Dile} to make luminaries for various holidays or just for fun.
While thinking about this a little deeper a few weeks ago {yes, I think deeply about holes, cans, and crafting. I thought that this method might work well for ribbon organization and with nothing left to lose, I tried it and it worked.

🧷Supplies
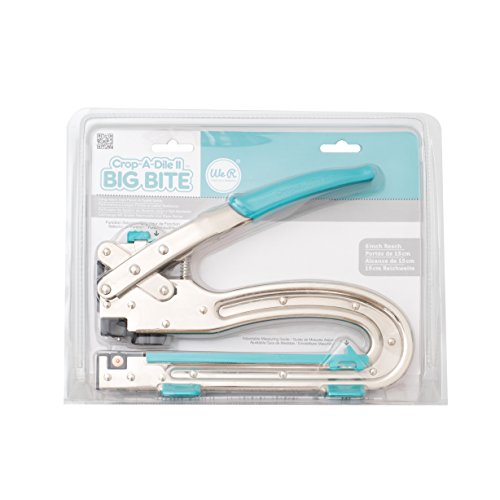
- Crop-a-Dile
- Eyelets
- Tin Can
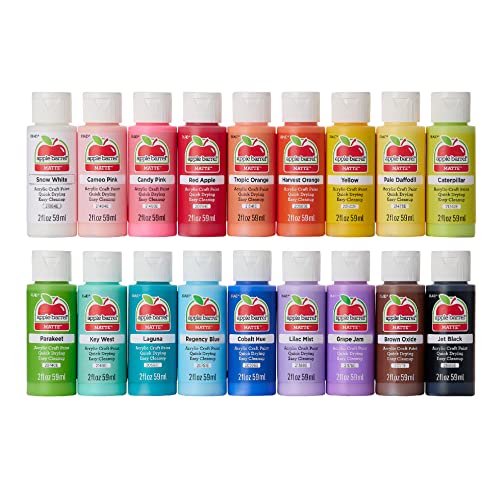
- Craft Paint - or any leftover paint you may have (I love Heirloom Traditions Paint - it literally covers EVERYTHING!)
- Ribbon
How-To Make a Ribbon Organizer

All you need is a tin can with the label removed. Make sure you wash out your can and that there are no sharp edges.

I used a line that was already on my can as the mark for placing a straight line of holes using my Crop-A-Dile. If I chose to add more holes I could have used a nail to put another hole below the furthest point that my Crop-A-Dile would go.

So that the hole edges weren't sharp I used my Crop-A-Dile to add eyelets to the holes. This also gives the can a more finished look.


Next, I dry brushed my can with some pink craft paint {use any color you wish!}. I applied 3 coats.

When all was dry I used a rubber stamp and a gold paint pad to stamp on a butterfly.
I had a little rub on crown left from a frame I made last year and put that on my can as well as the number 5 {stenciled on in white} and then rimmed in gold paint.
I also rimmed the eyelets with the gold.

Add your ribbon spools to the can one at a time feeding the ribbon ends through the eyelet hole.

Related
Looking for other crafts like this? Check these out!
That's it!


Hi, I must say this is a fantastic idea! I have a mountain of ribbon that could be organized with this! Thanks for sharing
So clever, charming and practical too. I love it Mary Beth! Definitely need to get myself a Crop-A-Dile.
Absolutely BRILLIANT!!! I love this idea!!!!! And you did a beautiful job with decorating the can.
<3 Christina at I Gotta Create!
Wildly Original linky party is open.
Thanks so much, Christina : )
Mary this is AWESOME!! Finally a use for my Crop-A-Dile! We love ribbon over at the Bowdabra blog and would be thrilled if you linked this up in our Saturday Crafty Showcase. It runs Sat-Thur and our Bowdabra Designers pick their favorites to be featured on Friday. Stop over and share you awesome idea!
Susie
https://bowdabrablog.com
Genius!
Hi,
Thanks for this absolutely fabulous tutorial.Inspiered me.
Have a look at my blog I’ll be so glad.
Hugs from Portugal
Ana Love Craft
http://www.lovecraft2012.blogspot.com
What a clever idea!
What a unique and clever way to store ribbon! Love this idea.
What a great idea, and so cute, too! I love it. Your newest follower on Networked. 🙂
I love this! Not only is it a frugal solution but I love that you recycled something to make it both useful and beautiful. Great job!
I would love it if you would share this at the Smart Solutions linky party. You can link up here:
https://theprudentpantryblog.blogspot.com/2012/08/prudent-projects-smart-solutions-week-7.html
Have a great day!
This is such a genius idea. I love using cans for craft storage and hadn't thought of organizing my ribbon this way. Thanks for sharing at this week's BFF Open House.
What a wonderful idea. I have been saving cans and decorating them and using them to get my craft room organized. I love this idea. Thank you for sharing.
I'm glad it's an idea you can use! : )
OK, I need to get a crop-o-dile because this is great. Thanks so much for sharing on Tout It Tuesday. Hope to see you tomorrow.
I love this idea! Recycling and organization all in one. 🙂
very pretty
Homa Style is having a Simple Holiday Gift Idea Link Party.
Your can ribbon organizer is incredible and I believe it would be perfect as a holiday gift idea.
Please join the link party at Homa Style.
Here’s the link https://homastyle.com/wp/2012/10/31/simple-holiday-gift-ideas/
Hope to see you there!
Great idea! I always have trouble finding the end on a ribbon spool. This is great!
I love this idea!
Thanks, Mel!
Love this tip...thanks so much