
Handmade Christmas Gift ~ Easy to Make Ribbon Bracelet and an OttLite Giveaway
Last Minute Handmade Christmas Gift and an OttLite Giveaway
I like to make handmade gifts for those on my gift list. Most of the time the gifts are just something simple that I can make in bulk. For years I have wanted to make ribbon bracelets but I thought they would be too hard to make....and then I watched a tutorial and was so happy to find out I could make them!

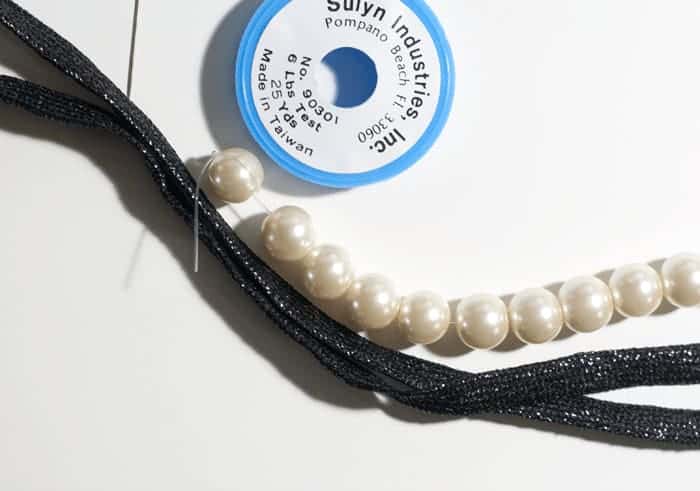
I didn't use ribbon for my first attempt but instead a fancy schmancy black shoelace that I had on hand. I did buy a strand of faux pearls at my local craft store for $2.00 and I had the jewelry string on hand.
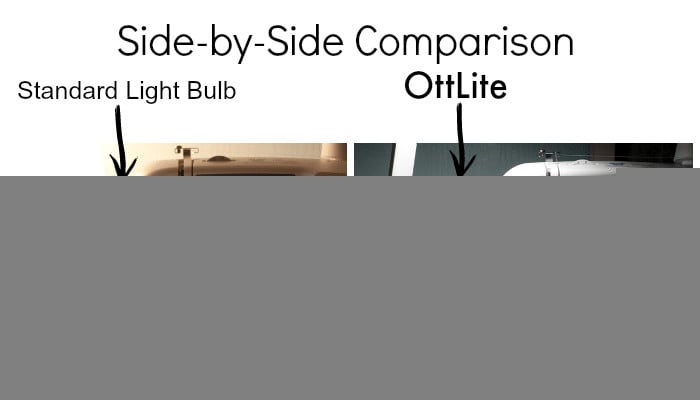
For the purpose of this tutorial you'll notice the lighting is a little different than my usual lighting but that's a good thing! My craft room is in the basement of my house and gets almost NO natural lighting so most of the time I don't do any pictures down there but I was very fortunate to receive an OttLite (and I get to offer YOU the chance to win one as well) and I thought the best way to show you how great the OttLite was would be to do all of the photos for this tutorial with the light from the OttLite alone. No other lights, no natural lighting and no additional lights were used and other than cropping ~ there was no editing of any of my photos.
Supplies:
Ribbon or decorative shoelace (you'll need about 24 inches of either)
1 strand of faux pearls or beads
Fishing line or clear jewelry string (is that what it's called????)
Sharp needle
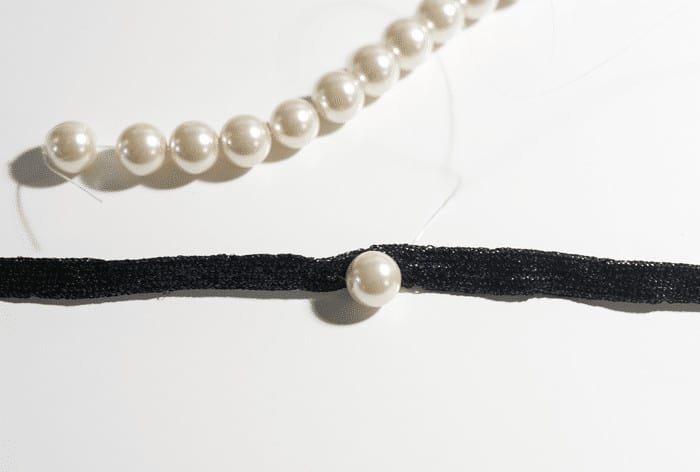
I measured about 8 inches in from one side of my shoelace and started to add my beads. I used the needle and jewelry string to pull up on one side of the bead and then down the other.
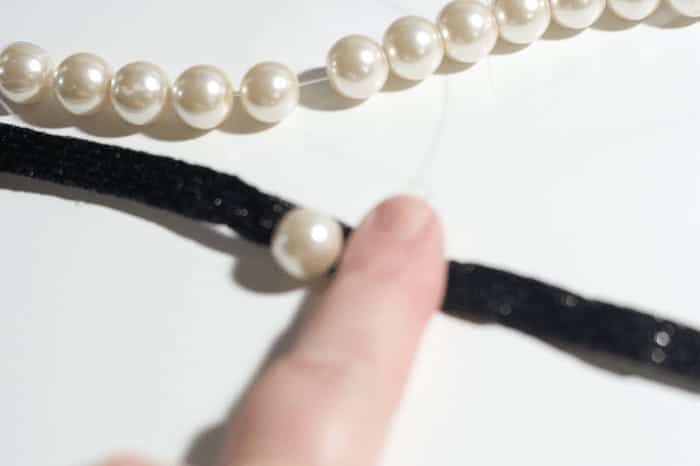 I used my finger to mark the space for the 'ruffle' (I had a really hard time getting this picture ~ I was holding the camera with one hand and obviously I am not that agile when it comes to things like this!).
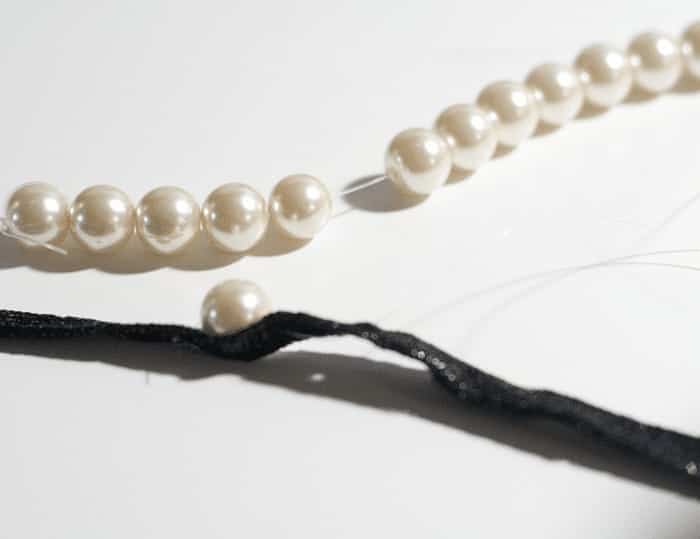
I eyed up the area of my finger and pulled the needle up at about the point where the edge of my finger was and then pulled tight before adding another bead.
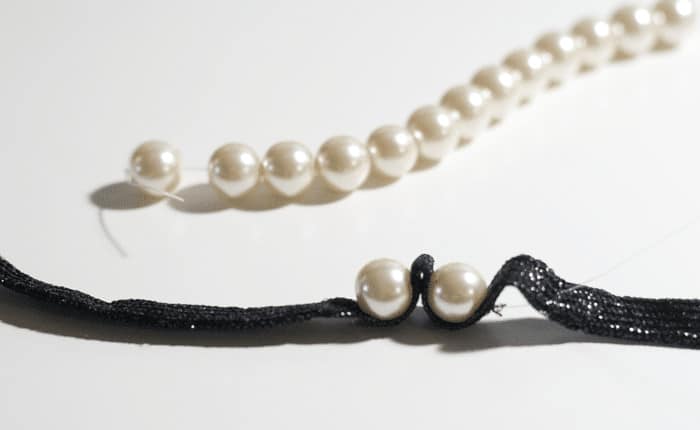 You'll keep repeating this until you have added as many of the beads as you would like (make sure to use a sharp needle or you'll get a snag like I did above).
 Notice to the far left that I added a knot at this point....ideally I should have added the knot first before adding my beads but it didn't make any difference in the process....just the appearance.
 When you've added all of your beads or feel your bracelet is long enough add a knot at the opposite end and make sure both ends WITHOUT beads are even because this is where you will tie your bow.
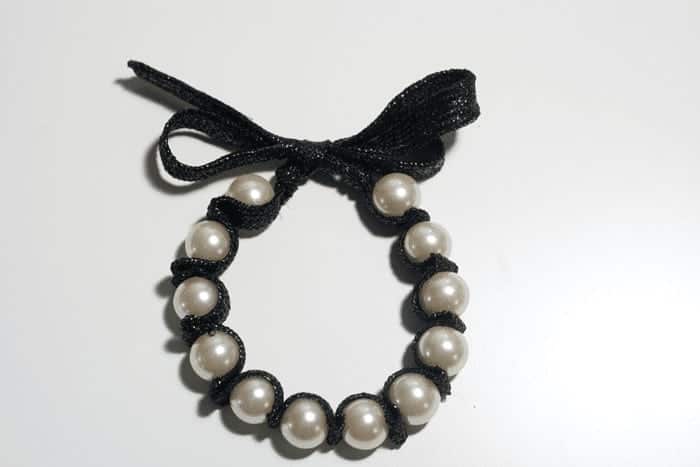 And there's you're finished bracelet! You could knock off a bunch of these for gifts in an afternoon using different colors of ribbons and beads.
*I received the OttLite Craft Caddy Lamp for this post ~ all opinions are my own ~ as always!
NOW...for the giveaway and a little info about the OttLite!

The OttLite I received and the one you can enter to win below is in caddy form ~ it is great for any area where you'll be crafting and you can keep your most-used craft items right in the caddy.
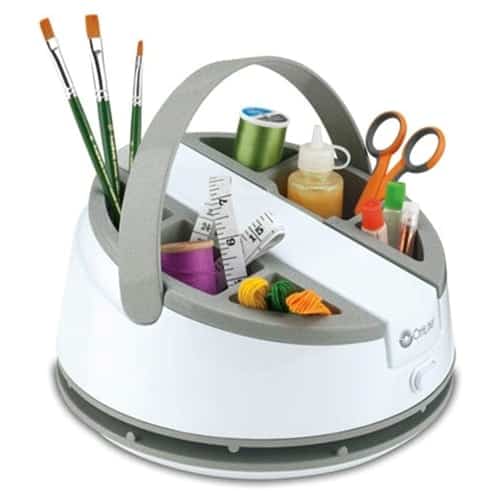
The light folds out and up for adjustment and when tucked back down the caddy handle can be used to tote your OttLite with you to another room or to a crafting event. There's also an extra plug right in the base which is a great extra (I have used mine for my glue gun).

OttLite Giveaway


I always wondered why OttLites were so popular. I totally get it now. Every crafting blogger needs one. My fingers are crossed for a win!!!!!!
Have a great day, Mary Beth!
I always wondered as well, Diane! I really like the one I received. It really helps with seeing things clearly and is very helpful for detail work. Hugs, mb
Adorable bracelet and LOVE ottlite!!
Thank you, June!
Nice comparison! I've always heard great things about OTT lights. How do you like your Brother sewing machine? Is that your only sewing machine?
Hi Darlene, I do like my Brother sewing machine. I also have a Viking that I love and I had a Singer that needed repaired ~ the cost of the Brother was less than the repair of the Singer and that's the reason I got this one. It is a nice machine for basic sewing but nothing too fancy.